Spaghetti Squash Egg-in-a Hole

spaghetti squash nest

Spaghetti squash egg in a hole can be an easy and healthy breakfast, brunch, lunch or even dinner. It’s also low carb, gluten free and packed with protein, something we’re all thinking about post holiday celebrations.

flaked spaghetti squash

I love spaghetti squash, I make it quite often it’s so versatile and really fills you up, in a good way. This recipe comes together fast if you roast your squash ahead of time and have your “spaghetti strands” read to go.

Here are a couple of my other favorite ways to use spaghetti squash.

spaghetti squash nests

Then all you do is grab a handful of your spaghetti squash and form it into a circle making a hole in the center.

cheese in nests

Then you’re going to fill that hole with some grated mozzarella so that the egg can sit right in there.

uncooked eggs in squash. nests

Carefully crack your egg into the center and adorn it with some pre-cooked toppings like bacon or some sautéed peppers, you can also use some sliced cherry tomatoes as well.

cooked squash egg in a hole

Bake it until the whites are set and you’ll have a very delicious, satisfying and fun to eat meal!

Enjoy!
5.0 from 1 reviews
Spaghetti Squash Egg-in-a Hole
 
A healthy and protein packed meal using versatile spaghetti squash, that's so delicious and fun to eat.
Author:
Ingredients
  • 1 spaghetti squash , medium to large size. Cut lengthwise with seeds scooped out
  • eggs, depending on how many "nests" you get from your squash, I got 5, one for each
  • No need for precise measuring here.
  • grated mozzarella to fill in the holes
  • grated parmesan
  • olive oil, salt and pepper
  • pre-cooked toppings like half pieces of cooked bacon, or some sautéed colored peppers with additional sliced cherry tomatoes
  • chopped parsley
Instructions
  1. You can roast your spaghetti squash ahead of time if you wish, which I usually do.
  2. Take your squash that has been cut with all the seeds. scooped out, drizzle with olive oil, salt and pepper. Place the squash cut side down on parchment paper and roast in an oven at 360 degrees until a knife goes through with a little resistance. The key is you don't want the squash overcooked, it can become mushy and watery, which you don't want. I like the squash cooked al'dente.
  3. Mine took about 25 minutes, but keep checking it all depends on the size of your squash.
  4. Then let the squash cool down flake the inside all over to get your spaghetti strands.
  5. Place the strands in a bowl and season it with a handful of grated parmesan, salt, pepper and a drizzle of olive oil.
  6. Place another sheet of parchment on a baking sheet, turn your oven up to 425F.
  7. Grab a handful of the spaghetti squash and place it on the parchment forming a circle with a hole in the center. Make sure the edges are high enough to hold in the egg, but the grated mozzarella will help with that as well.
  8. After you have your nests made, sprinkle each center with the grated mozzarella cheese, then place the cracked egg on top.
  9. Arrange the toppings of your choice right on top of the spaghetti nests.
  10. Drizzle the tops with olive oil and sprinkle each with grated parmesan cheese.
  11. Carefully place the sheet pan into the hot 425F oven and bake til the whites are set, around 15 minutes, but keep checking.
  12. Remove from the oven. and garnish with more parmesan and chopped parsley.
  13. Enjoy!


Signature

Cauliflower and Sausage Stuffing

cauliflower stuffing

Thanksgiving is only a couple of weeks away so it’s time to start talking and planning the big meal and side dishes. Do you have anyone you might be serving this Thanksgiving who is gluten free, keto or doing low carb, if so this is a great option.

Last year I made this cauliflower and sausage stuffing for a gluten free family member, not only she enjoyed it but everyone that tried it loved it, it definitely satisfies your stuffing desire.

It’s made similar to my traditional stuffing with all the same flavors going on except cauliflower florets replace the bread, but the nice thing is you’ll still get crispy bits along the edges ( my favorite part), with fresh and dried herbs mingled between the sausage and all the veggies.

low carb stuffing

I’ve always added breakfast sausage to our stuffing, preferably one flavored with extra sage, it’s tradition over here, so that’s what I’ve added in this cauliflower stuffing.

Feel free to add your favorite type of sausage or eliminate it all together. I do however suggest that you add in some mushrooms as I did to punch up the flavor and give it more bulk.


gluten free stuffing

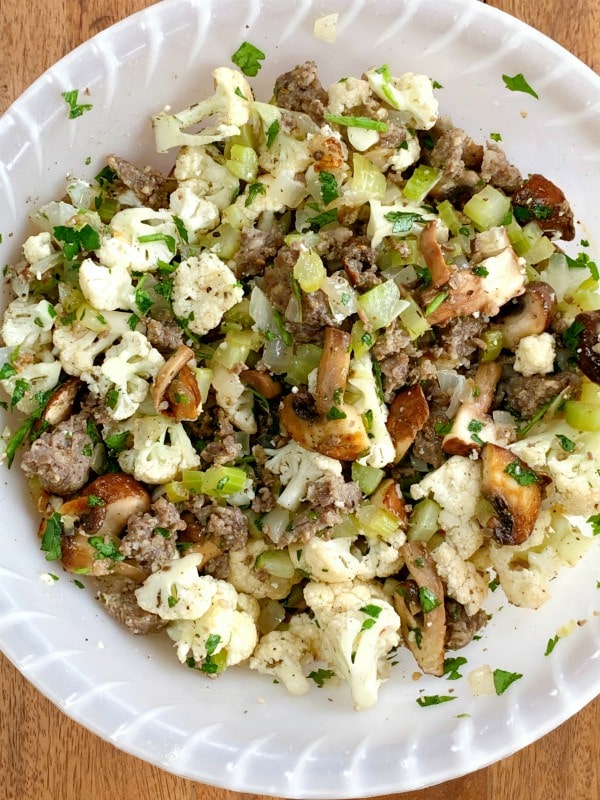
There’s a little bit of prep before like browning the sausage and a quick saute of the veggies, but as far as the cauliflower goes you can toss it in raw as long as the florets are in bite size pieces.

Everything then goes into as buttered casserole dish, like a traditional bread stuffing. This can all be prepped a day or two ahead then popped into the oven with the rest of the other sides on the day your serving it.

cauliflower and sausage stuffing

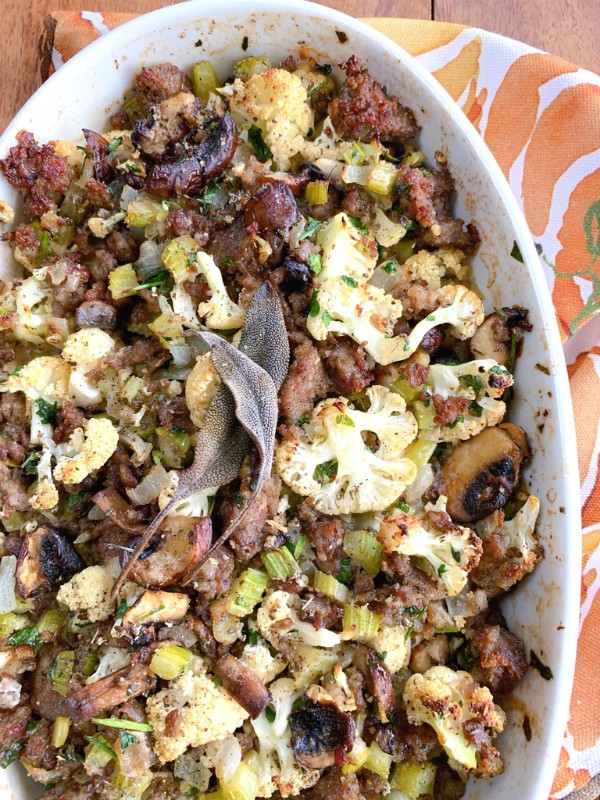
When it comes out it looks like this, crispy and golden. The cauliflower takes on all the traditional flavors of a bread stuffing but without any bread!

A delicious option for all to enjoy!

Cauliflower and Sausage Stuffing
 
A nice option for those who are gluten free and those preferring to eat less carbs.
Author:
Ingredients
  • 1 good size medium cauliflower cut into bite size florets
  • 1 lb. breakfast sausage like Jimmy Dean or Bob Evans, in bulk
  • 1 large onion, diced
  • 4 or 5 celery stalks, diced
  • 8 oz. baby bella mushrooms, sliced
  • 3 garlic cloves, crushed
  • 1 stick of butter
  • ½ to ¾ cup of chicken stock
  • handful of chopped parsley
  • dried sage, thyme, poultry seasoning (optional) salt and pepper to taste
  • Fresh sage leaves for garnish
Instructions
  1. Butter the inside of the casserole role dish you'll be using
  2. In a large skillet place remaining butter until it melts then saute the onions, garlic and celery until soft, then add the sliced mushrooms for a couple of minutes.
  3. Place all the sautéed veggies into a large bowl.
  4. Next brown up the sausage in the pan, breaking it up with a wooden spoon and cooking it until you see no pink.
  5. Drain the sausage on paper towels then toss it into the bowl with the sautéed veggies.
  6. Fold into the bowl the bite size cauliflower, raw. If you think its to big you can toss it into the skillet for a couple of minutes to take the rawness away.
  7. Add in the chopped parsley.
  8. Add in the spices, dried sage and thyme and poultry seasoning if using into the mix. Start with 1 teaspoon each and then taste for your preference, adding more if you like plus the salt and pepper.
  9. Place everything into the buttered casserole dish, then distribute the broth all around.
  10. Top with a few fresh sage leaves for garnish.
  11. At this point it's all prepped and you can refrigerate it 1 to 2 days ahead.
  12. When you’re ready to serve, heat oven to 400 degrees.
  13. lightly foil the dish for 15 minutes then remove the foil and continue roasting until cauliflower is tender, golden, the sausage edges have crispy bits.
  14. Ovens do vary so keep checking every 15 minutes or so, you can also stick it under the broiler for a few minutes at the end to get desired golden look if needed.


Signature

Slow Simmered Beef Braciole

braciole

Braciole is a popular Italian dish, it’s usually preserved for special family gatherings and not something you would normally eat during the week. Beef is the most commonly used meat and it’s typically flank or a top round steak. The meat needs to be pounded thin to tenderize it before it gets stuffed with a flavorful filling.

flank steak

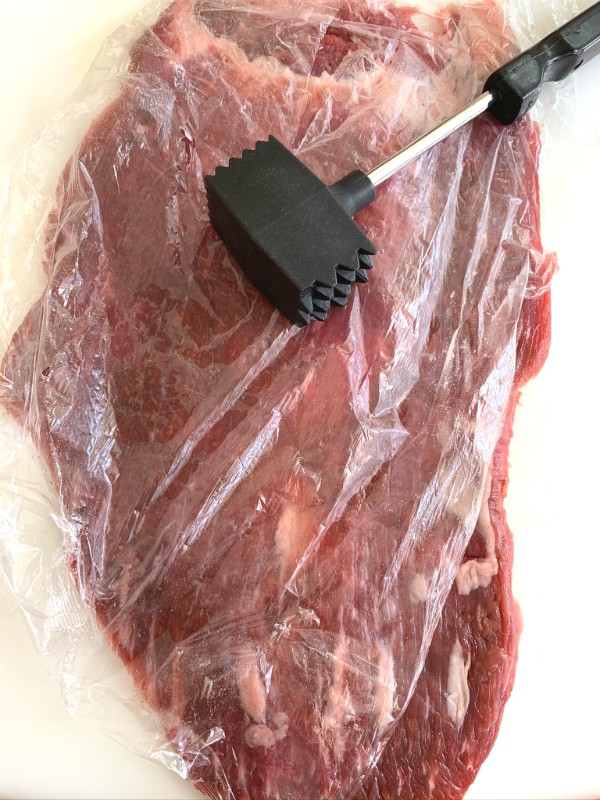
I like using flank steak, if it’s too thick you might have to ask your butcher to butterfly it open for you, or you can easily do it yourself at home. When and if you need that done then the next step is to tenderize it with a meat mallet, pounding it to about 1/8 of an inch thick

You can cut your meat in half lengthwise for smaller rolls or you can keep it large as one big roll, I’ve done it all different ways.

braciole stuffing

The fillings for beef braciole can be a number of things, some families add slices of prosciutto, pine nuts, raisins, spinach, I could go on and on. My version is pretty straight forward using fresh parsley, garlic, chopped hard boiled egg, grated Pecorino, some provolone or fontinella cheese and depending on whom I’m making this for I’ll add either dry breadcrumbs or torn pieces of soaked day old Italian bread.

Lately everyone seems to be watching their carbs or someone is gluten free so I make a version minus the bread/ breadcrumbs and I must tell you it’s equally delicious, you won’t be missing anything but the carbs!

un-cooked braciole

Some use toothpicks to secure their braciole after you get it rolled up, I use to do that in the past but found that often they would break open, either on the sides or middle and the filling would seep out into the sauce making a mess of it.

large braciole

I prefer using butchers twine I find it really holds the filling tightly inside and your rolls are more uniform.

browning braciole

Once rolled up and tied securely you’ll want to give the braciole a good sear on each side then deglaze the pan with some wine.

cooking braciole

Then it’s time to let them cook by submerging them into some good quality marinara sauce allowing the braciole to simmer away in a heavy bottom pan with the lid slightly ajar. Simmering is a process that you can’t rush, you’ll know they’re done, they’ll be nice and tender and the tip of a knife should go through them like butter!

large braciole

You can easily make braciole a day or two ahead of time, I’ve done that many times especially for parties.


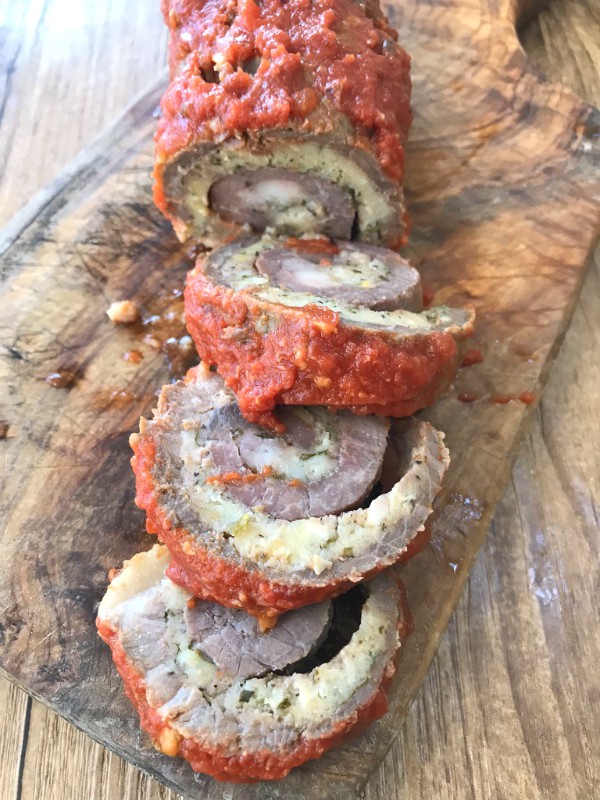
sliced baciole

If I make them ahead of time for a party I also like to take my time removing the strings and cutting the rolls while they’re cold.

I then layer the slices on a platter, so I can easily warm them up adding more warmed marinara.

Just remember this tip, after you fill them, you roll them up in a jelly roll style with the grain, but when you cut your slices it’s always against the grain.


cooked braciole

However creative you get with the fillings inside is up to you. This”fancy”comfort food can stand alone, eaten with just a salad, served with polenta or a favorite pasta of your choice, it’s all good!

Follow Proud Italian Cook on Instagram to see what else I’m cooking up during the week.

Slow Simmered Beef Braciole
 
You can get creative with your filling adding prosciutto, raisins, pinenuts, spinach if you wish. Below is my tried and true version.
Author:
Ingredients
  • 1½ to 2 lbs flank steak, butterflied if to thick then pounded with a meat tenderizer to ⅛ inch thickness.
  • 2 to 3 hard boiled eggs, chopped
  • 2 cloves garlic, minced
  • breadcrumbs, enough to spread all over your meat, or (soaked in water and squeezed out ) day old Italian bread, enough to spread all over meat
  • a handful of parsley, enough to sprinkle all over
  • grated pecorino romano spread generously all over the meat as well as grated provolone or fontinella cheese
  • salt and pepper to taste
  • a good drizzle all over the layered filling on the meat
  • wine for deglazing (optional)
  • 2 quarts of marinara
  • basil for garnish
Instructions
  1. After meat has been tenderized, salt and pepper it then rub the minced garlic all over.
  2. Sprinkle a good amount of pecorino all over.
  3. Add your bread crumbs or soaked bread and spread it all around, or eliminate this step all-together if making them gluten free.
  4. Spread your chopped eggs all around, along with the chopped parsley.
  5. Then end by scattering your shredded provolone or fontinella cheese.
  6. Lastly generously drizzle meat filling all over with olive oil.
  7. Tightly roll the meat up jelly roll style with the grain of the meat.
  8. Secure with butchers twine all over the roll, this process takes a little time but it's worth it.
  9. Drizzle some olive oil in the bottom of a heavy bottom pan that has a lid
  10. Sear well on both sides.
  11. Deglaze with wine, (optional).
  12. Then pour in your marinara with some torn basil.
  13. Put the lid on and slow simmer on top of stove until they become tender and the tip of a knife goes in like butter!
  14. Let the braciole rest before you remove the string and begin slicing them against the grain, or all this can be done the day before, cutting them cold as stated in my post.


Signature

Italian Meatballs with Ricotta (Low Carb and Gluten Free)

ricotta meatballs

There’s nothing like the smell of homemade meatballs cooking in the kitchen, and these tender beef meatballs enhanced with ricotta, pecorino and other classic ingredients are no exception.

Yes, there are many different ways to make classic and traditional Italian meatballs, every family has their own cherished recipes. In my family I make them a few different ways, traditionally with soaked bread and breadcrumbs, a mix of pork and beef, fried, baked, I could go on and on but recently this has become my current favorite and neither bread nor breadcrumbs are added into the mix.


ricotta meatballs

Ricotta laced meatballs are so tender and flavorful, the taste is incredible and I promise you you’re not going to miss the addition of bread, so because of that ricotta meatballs are perfect for those on a low carb and gluten free diet.

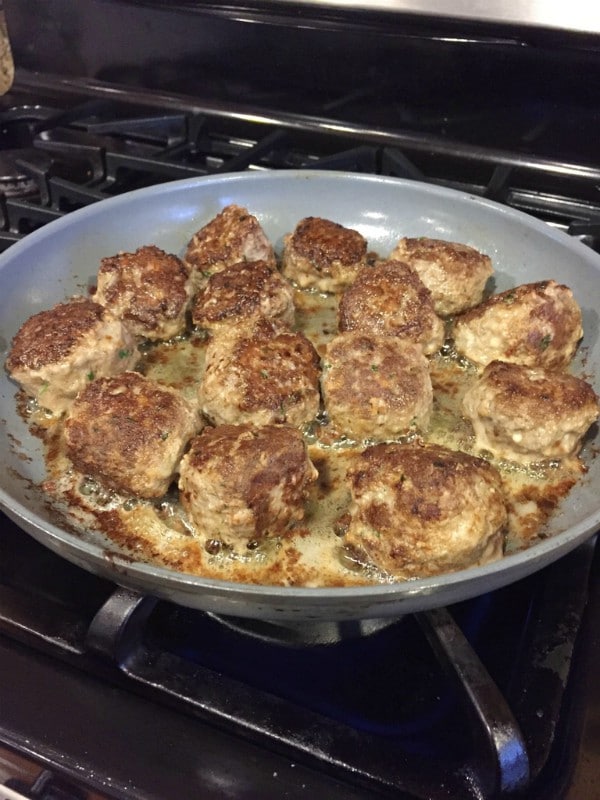
pan fried meatballs

I like using organic ground beef which is 85% lean and 15% fat. I also prefer to pan fry them in a little olive oil after they’re formed. Pan frying allows them to become caramelized all over and form a crust which is a very important step that adds to the intense flavor, and there’s no need to cook them all the way through.

ricotta meatballs

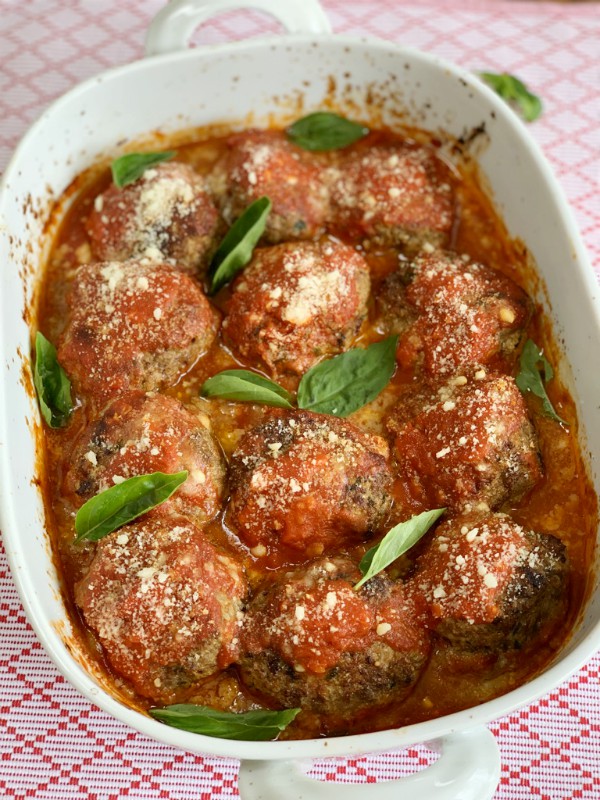
The meatballs will be finished off in the oven along with a good quality marinara for them to bathe in, preferably homemade.

ricotta meatballs

You’re always going to treasure your own tried and true family recipes that have been handed down through the generations but it’s also fun to discover new favorites along the way, I hope you give these a try, they’re truly amazing!

5.0 from 1 reviews
Italian Meatballs with Ricotta (Low Carb, GF)
 
Author:
Ingredients
  • 1.5 lbs. organic ground beef, 85% lean 15% fat
  • 1 egg
  • ½ onion, finely chopped
  • 2 very generous heaping tablespoons ricotta, look for a good quality supermarket ricotta, not the over the counter deli type which holds a lot of moisture.
  • 2 garlic cloves, smashed or grated on a microplane
  • 1 large handful of grated pecorino romano and 1 large handful of Italian parsley chopped
  • salt and pepper to taste and a pinch of red pepper flakes (optional)
  • 1 good quality jar of marinara, preferably homemade
  • basil for garnish
Instructions
  1. In a large bowl mix all the ingredients together well. Before you form mixture into balls, fry off a little bit of the meatball mix, this way you can really check for the right seasoning. Sometimes you need more grated cheese, pepper, salt, parsley and this way you'll be able to adjust to your liking.
  2. Drizzle olive oil in a nonstick skillet and when oil is hot drop your formed meatballs into the pan and caramelize on all sides, no need to worry about cooking it all through, just make sure to get a nice crust all around.
  3. Preheat oven to 450 degrees
  4. Spoon some marinara into the bottom of a casserole dish, add the meatballs, then spoon some sauce on top of each one as well.
  5. Bake uncovered for 15 minutes.
  6. Garnish with fresh basil leaves.
  7. Enjoy!


Signature

Noodle-less Loaf Pan Butternut Squash Lasagna

noodle-less butternut squash lasagna

Butternut Squash is hands down my favorite winter squash, come fall I can’t get enough of it and you’ll always see one or two sitting on my kitchen counter. Butternut squash is so versatile, you can put it in just about everything and believe me I have!

If you look through my blog you’ll see different ways that I’ve used it over the years, and one of the ways is in a lasagna. Butternut squash has a slightly sweet, buttery nutty flavor and it goes wonderful with creamy ricotta and a béchamel sauce, it’s so decadent and delicious. 
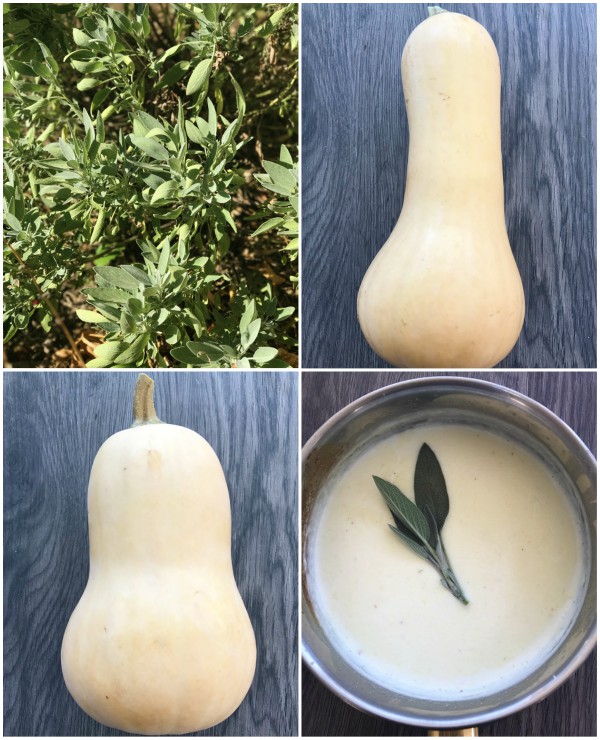
butternut squash

This is the time of year when my garden is full of sage and butternut squash and sage make a perfect pairing together, I especially love to infuse my béchamel sauce with garlic and sage, it’s dreamy.loaf pan lasagna

If you search my archives you’ll see that I once made individual butternut squash lasagna’s minus the noodles in a free form manner.  For this time I wanted to try making it in a loaf pan which allowed me to get many layers and some nice height, and this version is minus the noodles as well. The loaf pan holds everything nicely together and gives the lasagna a little more structure since the pasta is not there to give it more body.

I lined my loaf pan with parchment, (which is optional) because honestly I wanted to un-mold it and take a nice photo to show you, but you have to really cool it down to be able to remove the parchment without destroying your lasagna, so I would suggest make it the day before or early in the morning if you want to do the same, chilling it for an easy removal, then just warm it and serve it with warm béchamel, otherwise make it without the parchment.

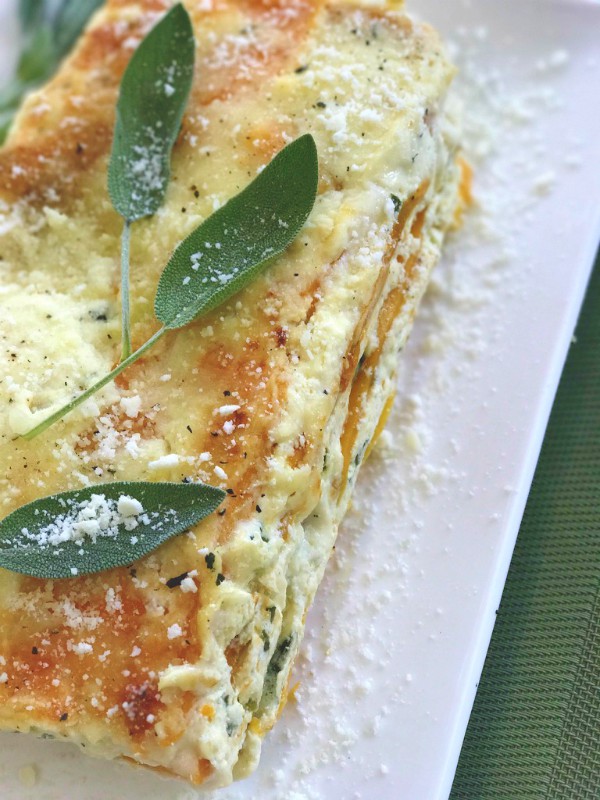
noodle-less butternut squash lasagna

Either way it’s magical and tastes like a dream and trust me you won’t miss the pasta at all, in fact I prefer it without because all the flavors are true and not soaked up by the pasta.noodle-less butternut squash lasagna

The loaf pan makes you able to create multiple layers of goodness,  just remember to let it set before cutting into it so all the creaminess can tighten up a bit, just like a traditional lasagna it’s a mess if you cut into it hot, the layers get lost.noodle-less butternut squash lasagna

I hope you try my noodle-less, loaf pan butternut squash lasagna, I promise you won’t miss the pasta one bit!

Follow along with me on Instagram to see what else I’m making during the week.

5.0 from 1 reviews
Noodle-less Loaf Pan Butternut Squash Lasagna
 
Author:
Ingredients
  • 1 loaf pan, buttered, lined with parchment which is an optional step for removal of whole loaf
  • NOTE; If you don't want to remove whole lasagna out of the pan, omit parchment.
  • 2 butternut squash, peeled and sliced lengthwise (as much as possible, then into lengthwise pieces) roasted at 375 on a rimmed baking sheet at 375 until softened up a bit but still al'dente
  • 3 cups, ricotta cheese
  • ½ cup grated pecorino cheese, plus extra for garnish
  • 1½ cups fresh baby spinach, chopped
  • 1 cup shredded mozzarella
  • 1 egg
  • salt and pepper to taste
  • BECHAMEL SAUCE
  • 2 cups, whole milk
  • 4 tablespoons, flour
  • 4 tablespoons, butter
  • sprig of sage, plus extra for garnish
  • 1 garlic clove, smashed
  • salt and pepper to taste
Instructions
  1. Roast sliced squash a head of time so it can cool down. Set aside.
  2. Mix up the ricotta mixture with the chopped spinach, egg, grated cheese's, both pecorino and mozzarella, salt and pepper. Set aside.
  3. TO MAKE THE BECHAMEL SAUCE;
  4. In a saucepan, melt butter, add garlic then whisk in flour until it incorporates and turns golden, not dark brown.
  5. Pour in a few tablespoons of the milk, whisking until moistened.
  6. Add the remaining milk whisking vigorously until it starts to thicken and right before it starts to bubble on the sides, take it off the heat.
  7. Now the layering process begins, add a couple of tablespoons of bechamel to the bottom of pan, then a layer of squash, enough to fit all the edges and middle of the pan. Spread ricotta layer on top, smooth with the back of a spoon or an off set spatula, add two more tablespoons of sauce and repeat layers until you reach the top of the loaf pan, reserving the prettiest looking pieces of squash for the very top.
  8. Spread the top with bechamel and sprinkle with pecorino and top with some sage leaves before baking.
  9. Bake 350- 375 uncovered until cheese is melted and heated through, and golden on top, ovens vary with time, check after 30 minutes.
  10. Let it set up before cutting, mine set for 2 hours.
  11. You should have extra sauce to serve with it, if you want more bechamel just double the recipe.
  12. Enjoy!


Signature

Fried Red Tomatoes Italian Style with Basil Pesto Aioli

fried red tomatoes

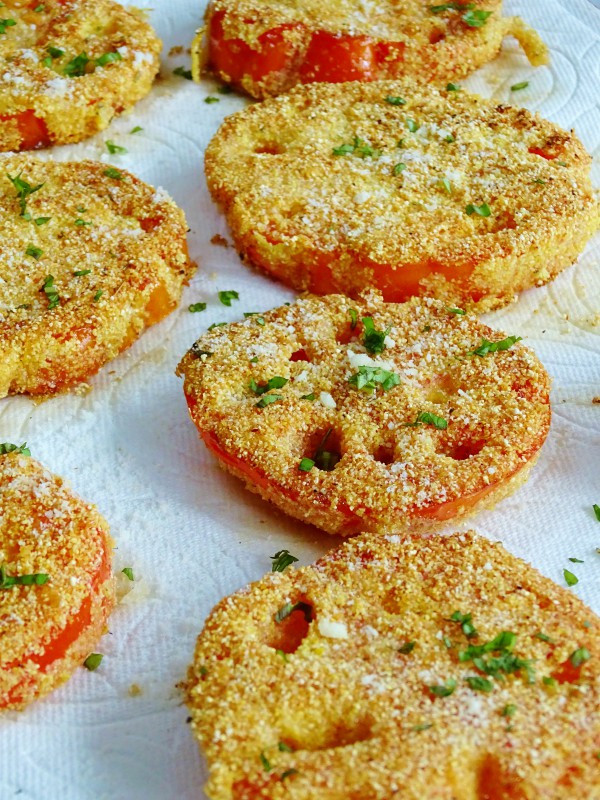
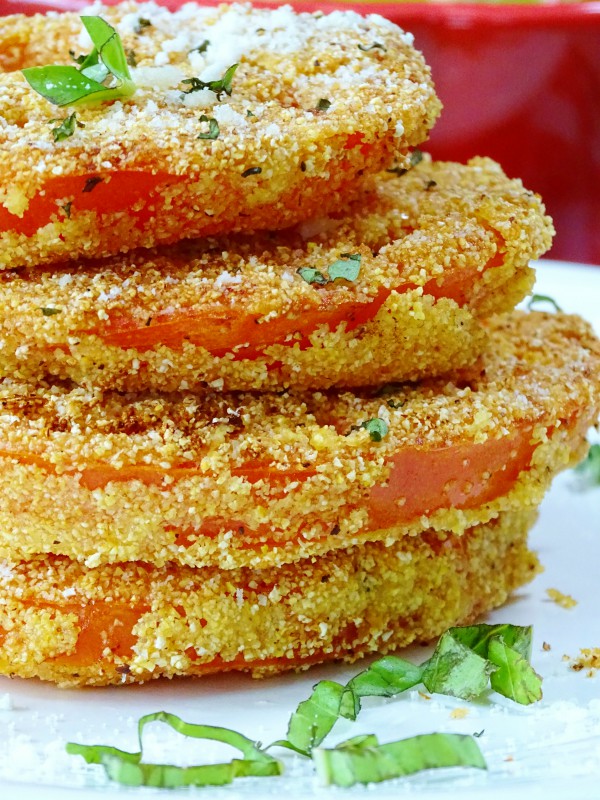
I think I just discovered my new favorite summer indulgence, fried red tomatoes, they’re made Italian Style with basil pesto aioli for dipping. Yes, I repeat, fried RED tomatoes. I’ve had the green version in the past, but I  must say I much prefer these so much more, but that’s my opinion and you’re going to have to decide for yourself.heirloom tomatoes

Try to pick tomatoes that are not super ripe and juicy like the kind you’d use in a caprese salad, that’s not what you want at all. The ones pictured above are ripened but yet still firm to the touch, that’s exactly what you want to use.  The tomatoes need to be able to hold up to some dipping and frying.fried green tomatoes

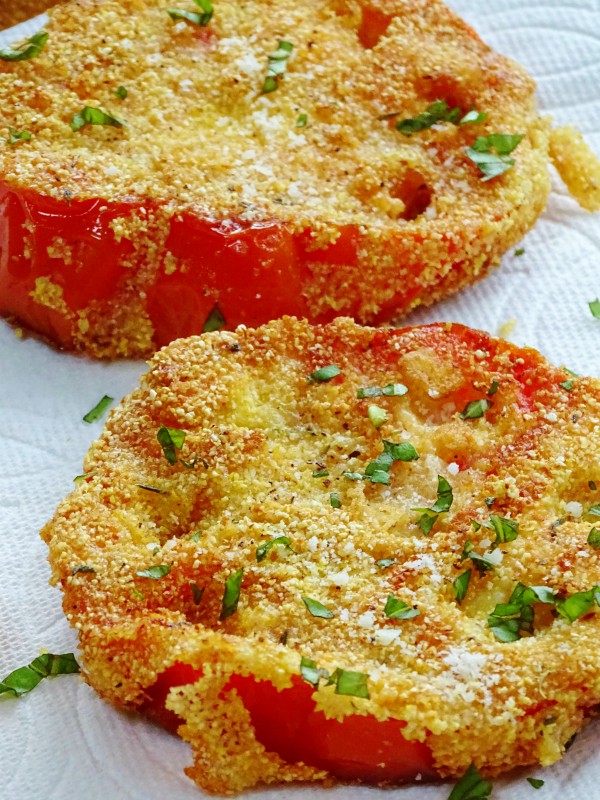
For my “breading” I dipped each tomato slice into beaten eggs and then into a combination of dried polenta and finely grated romano cheese, it’s such a winning combo and it’s even gluten free!
fried red tomatoes

They just take a few minutes to make, they crisp up in no time at all, but resist eating them while still hot from the pan because there’s no comparison to the flavor you get when you bite into them after they’ve cooled down at room temperature.

fried red tomatoesbasil pesto aioli

Basil and tomatoes are a match made in heaven so be sure to make this easy basil pesto aioli to swipe into those crispy, crunchy bites.

fried red tomatoes

Go ahead, indulge yourself, it’s worth every bite, summer will be gone before you know it!

Follow me on Instagram to see what I’m cooking up daily.

5.0 from 3 reviews
Fried Red Tomatoes Italian Style with Basil Pesto Aioli
 
Author:
Ingredients
  • large size, firm yet ripened tomatoes, I used heirlooms, sliced ¼ inch thick.
  • dry polenta
  • romano cheese, finely grated
  • dried thyme, granulated garlic, salt and pepper to taste
  • 2 eggs, beaten
  • olive oil for pan frying
  • BASIL PESTO AIOLI
  • good quality mayo
  • basil pesto, homemade or good quality store bought
  • fresh basil for garnish
Instructions
  1. Start by slicing your tomatoes into ¼ inch slices, cutting off the tips and bottoms.
  2. Pull out the seeds with the tip of your finger, you don't want the slices to be wet.
  3. Lay tomato slices onto a paper towel to pat dry.
  4. Make your pesto aioli by simply stirring some good basil pesto into a good quality prepared mayo, stirring to incorporate and tasting to your satisfaction, adding more if needed.
  5. Equal parts polenta and finely grated romano cheese.
  6. Sprinkle in some dried time, a little granulated garlic, salt and pepper.
  7. Beat two eggs, use more as needed depending how many tomatoes you are using.
  8. Heat a frying pan on the stove and cover the bottom with olive oil, keep on medium heat.
  9. Dip tomato slice into the egg then into the polenta cheese mixture.
  10. Place into the frying pan and don't flip it until it is nicely golden, then flip and do the other side.
  11. When crispy, gently remove and place onto a paper towel to absorb grease, which is not much.
  12. Sprinkle with a little salt and let them cool down before eating.
  13. Sprinkle with finely chopped basil, a little sprinkling of cheese and serve with the basil pesto aioli.


Signature

Zucchini Noodle Pasta with Roasted Tomatoes and Burrata

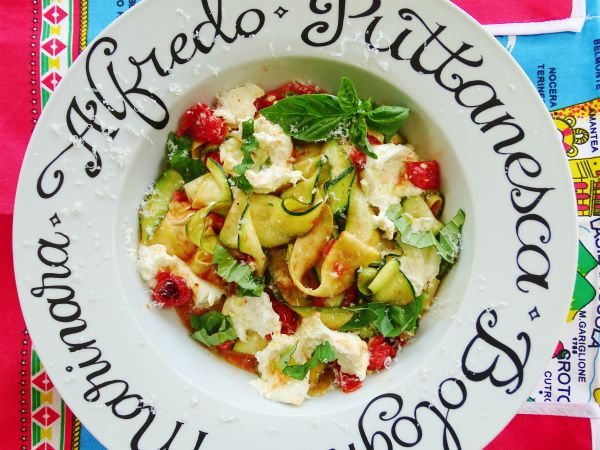
zucchini noodle pasta Zucchini noodle “pasta” may be light on the carbs but certainly not light on taste, add in some garlicky roasted tomatoes, fresh basil and dreamy burrata cheese and it’s a flavor explosion!

zucchini pasta ingredients Fresh zucchini ribbons shaped like wide pappardelle pasta get tossed into hot roasted tomatoes with all that precious juice, no need to cook or soften the zucchini beforehand because it wilts down to the perfect al’dente bite from the warm tomatoes.

It’s a fun summer meal, easy to make plus it’s fresh and light.

zucchini noodle pasta Can we just talk about Burrata cheese for a minute, if you’re not familiar with it, it’s an Italian cheese, a beautiful knotted ball of fresh mozzarella on the outside with a surprise on the inside when you tear it open. Inside you’ll find it stuffed with milky, creamy mozzarella curds, it’s so dreamy and everything you use it for will surely elevate your dish.

Tomatoes, burrata and pasta of any kind are a match made in heaven.

zucchini noodle pasta

Gently rip it open and let all that creaminess mingle with the fresh basil and ribbons of zucchini, you might be making it all summer long.

Follow along with me on Instagram where you can see what I’m cooking up daily.

Zucchini Noodle Pasta with Roasted Tomatoes and Burrata
 
I usually roast a whole quarter sheet pan of tomatoes, two or three pints, if you have extra that's fine.
Author:
Ingredients
  • 3 or 4 medium zucchini
  • 3 pints of cherry tomatoes
  • 3 cloves garlic, shaved thin
  • 3 - 2 oz. balls of burrata cheese or 6 oz.
  • a large handful of fresh basil, chopped
  • ⅓ cup or so of EVOO
  • grated parmesan
  • salt and pepper
Instructions
  1. Preheat oven to 400F.
  2. Line a quarter sheet pan with foil, add the oil, tomatoes, shaved garlic, half of the basil, salt and pepper.
  3. Roast tomatoes until they burst open and juices mingle with the oil and garlic.
  4. While tomatoes are roasting, trim the top and bottom off of the zucchini and with a vegetable peeler make your ribbons, when you get to the seeds turn the zucchini, keep turning and peeling until you go all around the zucchini leaving the seeded center in tact. ( save it for an omelette).
  5. Place your raw zucchini ribbons right into your serving bowl and when the tomatoes are finished roasting pour them right over, juice and all and gently toss.
  6. Take your burrata and tear it open all over the top so all the flavors can mingle together.
  7. Garnish with the remaining chopped basil and freshly grated parmesan cheese.
  8. Eat immediately


Signature

Zoodle Pasta Pie

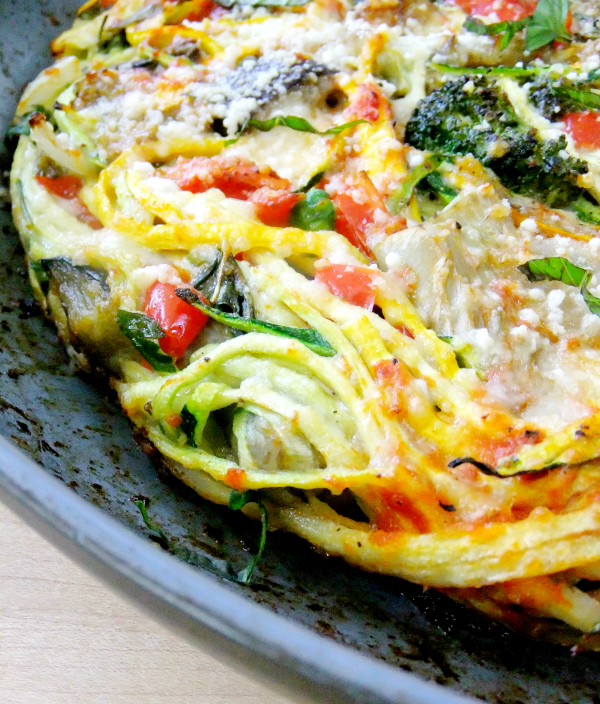
zoodle pasta pie

There’s not one strand of real spaghetti in this pie, it’s all made with zoodles, zucchini noodles, which are still all the rage, have you tried them yet?

Leftover veggies, strands of zucchini pasta, a couple of eggs, herbs and cheese form this savory pie, cut it into wedges, serve it alongside a salad and it becomes a satisfying and healthy meal!

pizza pasta pie

Just for comparison I wanted to show you my Pasta Pizza Pie,  in the photo above it’s made with real spaghetti strands and leftover veggies, each of these dishes are made similar, except this time I just switched out the pasta for zoodles.

zucchini zoodles

Zucchini season is peaking right now and this is just another fun way you can use some of it.

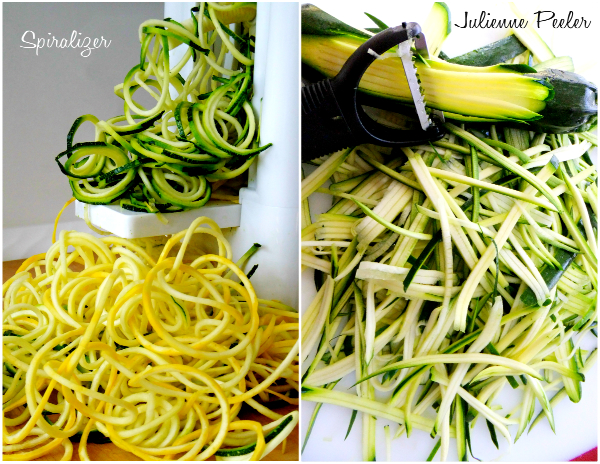
zoodle gadgets

One of the ways that you can make zoodles is with a spiralizer, I love using  it because it makes continual strands that are nice and curly, this is the one I use, but sometimes I just don’t feel like taking out a big gadget and then having to clean it, so I’ll use my julienne peeler instead.

The strands aren’t as long and you don’t get that continuous curl, but when wilted down a bit you can’t tell much difference, check out this older post of mine, titled Faux Spaghetti, and see what I’m talking about..

zoodle pasta pie ingredients

Just use whatever veggies and herbs you might have on hand, you don’t need much, I used an eggplant, some mini red pepper rings, artichoke hearts, peas, broccoli tops and onion, again it was just small amounts.

zoodle pasta pie

The cheese will bind it all together and form the perfect zoodle pasta pie!

Follow me on Instagram!

zoodle pasta pie

Zoodle Pasta Pie
 
This is a take on a pasta pizza pie I made by just replacing the pasta with zucchini noodles or "zoodles" it's healthy, low carb and gluten free and it tastes amazing!
Author:
Ingredients
  • I used a 12" oven proof skillet
  • 4 or 5 zucchini, or a mixture of yellow squash and zucchini, turned into zoodles
  • leftover veggies of your choice, diced medium and pre-cooked or roasted
  • fresh basil and parsley
  • 2 beaten eggs
  • 2 small garlic cloves, minced
  • ½ small onion
  • parmesan or romano cheese, grated
  • 1 cup, mozzarella cheese, shredded
  • olive oil, salt and pepper to taste
Instructions
  1. Create your zoodles first, then place in a big bowl, add your beaten eggs, a generous handful of grated cheese, the mozzarella, herbs and cooked vegetables, gently toss and combine everything.
  2. Drizzle some olive oil on the bottom of skillet, saute onion and garlic
  3. Add the zoodle mixture and let the bottom set a bit until you see a golden color.
  4. Finish it off in a 400 degree oven, until cheeses melt and bind everything, convection roast if you have it.
  5. Let it rest before cutting it, I cut my wedges with a pizza cutter.


Signature

Fresh Watermelon Cake

watermelon cake

Here’s a fun and creative way to serve up your next watermelon, carve it into a “cake”!

Who doesn’t love watermelon, it’s a summer staple usually always present at cookouts and parties. This “cake” is made with sweet refreshing watermelon that has been carved and shaped into a cake, it gets frosted with fresh whipped cream and is decorated with fresh summer berries, this could be the perfect red, white and blue cake for your Fourth of July party.

I’ve seen this done online and I couldn’t wait to try it myself, I was skeptical about putting the cream on a wet surface but all you do is pat the melon down really good with paper towels after it’s cut, and I was pleasantly surprised how easy and quick it was to put it all together.

I actually made this early in the morning, had it all frosted and garnished, stuck it in my fridge and pulled it out later in the evening and it was flawless, everything stayed in tact, in fact the cream set up so nice and firm and it was so easy to cut into nice wedges, even leftovers the next day were perfect!

watermelon

Find yourself a nice round seedless watermelon, you’re going to be cutting the top and bottom off so pick a size according to how many guests you’ll be serving.

ingredients for watermelon cake

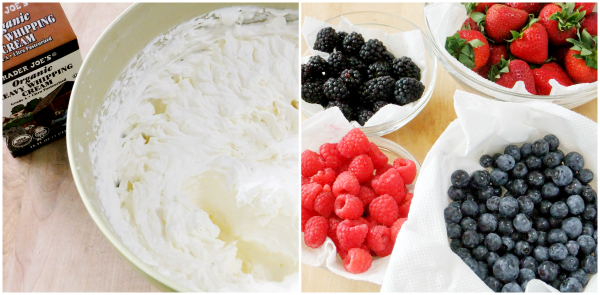
The first thing I recommend doing is whipping your cream, you want very stiff peaks and then refrigerate it, get it nice and cold. Have all your berries washed and ready to go. You can garnish your “cake” with whatever you want, berries, nuts, sprinkles, slivered almonds, coconut or other fruit of your choice, make it your own and be creative!

watermelon cake

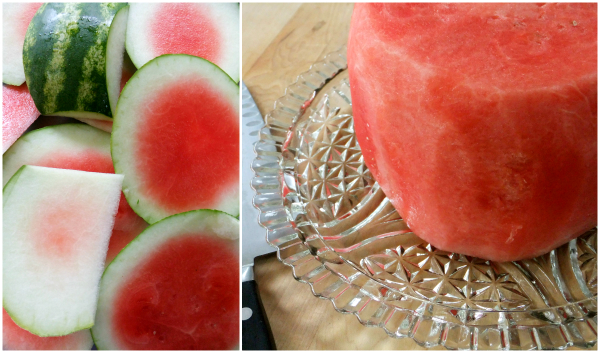
The trimming was easier than I thought, after you remove the top and bottom stand it upright and start slicing the dark outer green rind off all the way around and make sure you see none of the light green rind underneath showing either, take your time and start trimming and shaping it to look like a cake.

watermelon cake

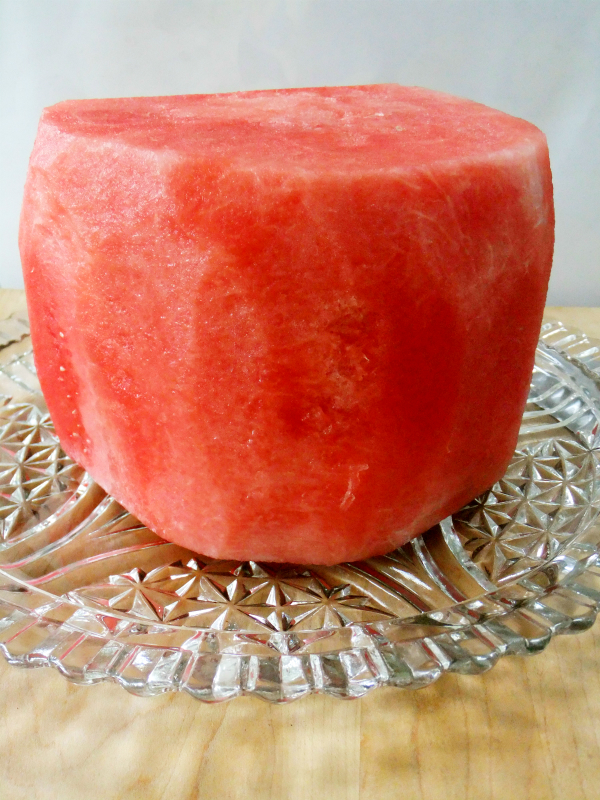
When you’re done trimming it put it on top of the platter you’ll be serving it on, don’t worry it doesn’t have to be perfectly shaped.

watermelon cake

The whipped cream will hide all the imperfections and so will all your added fruit and garnishes.

watermelon cake

It’s unexpected, impressive and a guaranteed show stopper when you bring it out to the table and no baking required!

Happy Summer and Happy 4th!

Fresh Watermelon Cake
 
Refreshing, unexpected and a beautiful way to serve a watermelon, transformed to look like a cake. It's healthy and delicious too!
Author:
Ingredients
  • 1 whole seedless watermelon
  • 3 cups of heavy whipping cream ( you'll probably have some extra)
  • ½ teaspoon of vanilla
  • 2 tablespoons of confectioners sugar or other sweetener like stevia
  • assorted fresh berries and other garnishes of your choice like nuts, sliced almonds, coconut, sprinkles, etc.
Instructions
  1. First whip your cream with the confectioners sugar and vanilla, whip until you get nice stiff peeks, then refrigerate bowl.
  2. Wash and dry the whole watermelon.
  3. With a sharp knife slice the top and bottom off.
  4. Standing upright begin removing the dark green rind all around.
  5. Keep trimming the sides removing the light green rind underneath and trimming it into a nice cylinder shape.
  6. Wipe and pat dry the cylinder with paper towels to remove excess moisture.
  7. Place shaped and patted dry melon on serving platter.
  8. Spread cold whipped cream all over with a rubber spatula, top and sides.
  9. Garnish with berries or other things of your choice.
  10. At this point you can refrigerate it until ready to cut. I placed the whole platter into my fridge and didn't cover it, but if you had a cake plate topper that would fit over the top, that would be fine too but not necessary.
  11. If you have some of the "cake"remaining after cutting just refrigerate soon after so the whipped cream doesn't melt down, especially on a hot day.


Signature

It’s Paella Time Again….My Way

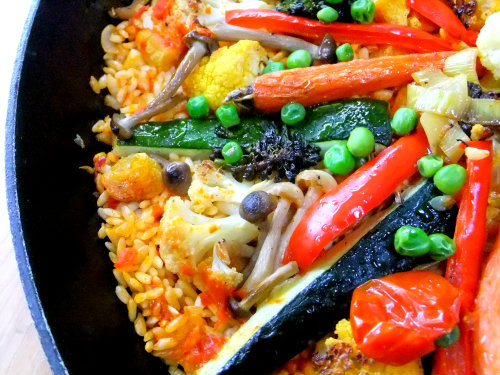
vegetable paella This is not the first time I’ve made and posted a vegetable paella here, I think it’s been about a year and a half since I made my  first one, but I just love making them because you can be as creative as you want with all sorts of vegetables, especially what is currently in season right now.

The rice is your blank canvas, so everything you place on top of it just makes the whole dish come alive!

vegetable paella ingredients This was not a planned recipe what so ever, these were the actual veggies that I had in my fridge the other day, so before they went bad I decided to roast them all, which I do quite often.

Roasting vegetables dramatically enhance their flavor, It’s a simple method where the vegetables are tossed in olive oil, sprinkled with salt and pepper then placed in a 425 degree oven and roasted until nicely golden and tender.

I usually have a few rimmed baking sheets going at the same time because I like to roast the vegetables individually according to their kind instead of mixing them all together. As you can see I had quite a variety!

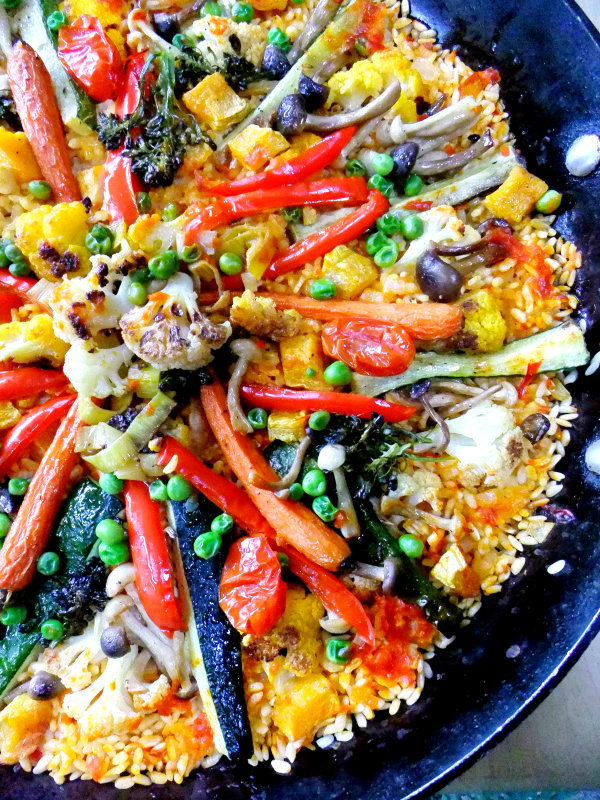
I used red pepper, broccolini, yellow squash, zucchini, leeks, butternut squash, baby thin carrots, fennel, yellow and white cauliflower and those cute little enoki mushrooms. I also added roasted cherry tomatoes and a sprinkling of frozen peas.

The point is you can make it your own with whatever vegetables you have on hand, don’t be afraid, anything will work. The more color the better, just play around with it and have fun, and besides, eating more color brings many health benefits to us, and that’s a good thing!

vegetable paella  The instructions for paella and starting the rice can be found here in my previous post, just change out the veggies and make it your own, of course mine is not so traditional but made with an Italian flare.

It’s a one pan meal you can pull together during the week,( especially if you roast your vegetables ahead of time) or special enough to serve to your guests at a dinner  party. Any leftovers you might have taste equally as good the next day!

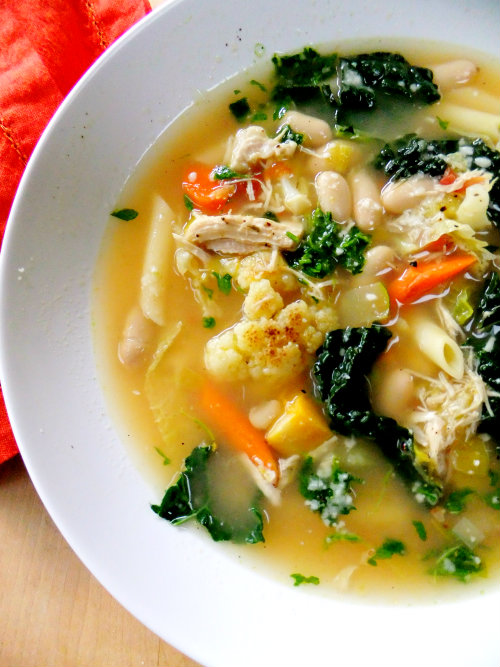
roasted vegetable soup with chicken and beans I guarantee you’ll have extra roasted veggies left over so why not make a hearty minestrone with them like I did.  I mixed homemade broth with a good boxed broth, simmered it for a while with a few parmesan rinds ( or grated cheese) that I always keep in my freezer plus a can of cannellini beans, some kale, leftover chicken if you have it and cooked pasta if you like.  When the broth is nice and cheesy  place some of those leftover veggies into a bowl and ladle the broth right on top. So good, and so good for you!
 

Signature

Butternut Squash Noodles with Sausage, Mushrooms and Kale

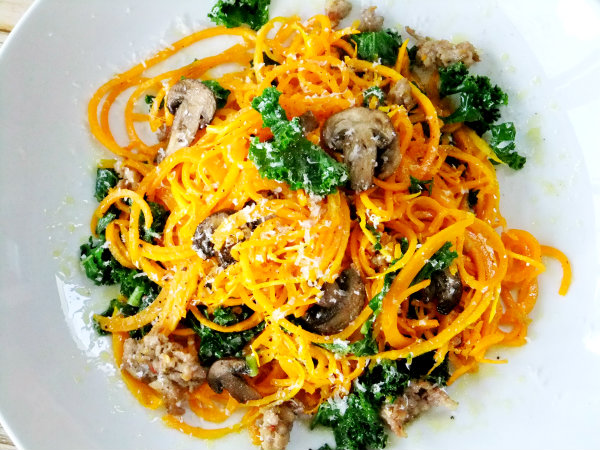
butternut squash "noodles" with mushrooms, sausage and kale Here I go again with my Spiralizer, but this time it’s all about butternut squash “noodles”! As soon as fall arrives you’ll always see a butternut squash or two sitting on my counter, it’s my favorite squash, it’s so versatile and easy to incorporate into so many meals.

If you did a search on my blog you would see how often I cook with it. I’ve made ravioli, polenta, lasagna, tarts, salads, pizza, I could go on and on and one of my most popular recipes, butternut squash gnocchi, I always get requests for it.

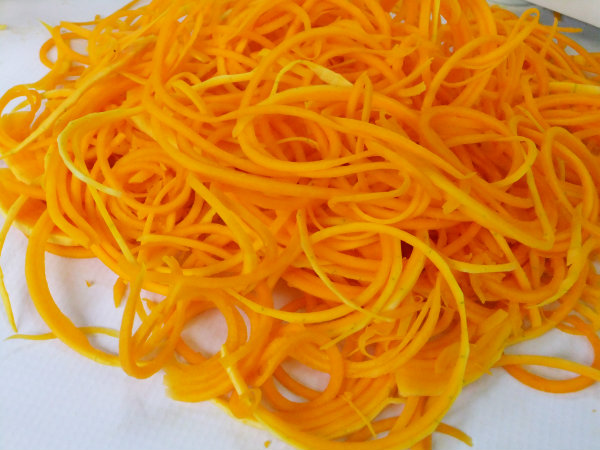
spiralizer and butternut squash I like using a Spiralizer because you really get spaghetti like strands, in the past I’ve used a julienne peeler and while that works pretty good you don’t get that curly continuous look of real spaghetti. A good tip to remember when making spiralized butternut squash is to pick a squash on the smaller size that has a long neck on it, because basically you’ll just be using the neck of the squash, just dice and roast up the bulb part for something else.

butternut squash "noodles" See how long and curly the strands are? It’s a wonderful thing!

butternut squash "noodles" You’ll have to slightly roast the squash beforehand by placing the “noodles” on a baking sheet, tossed and drizzled with olive oil, a little salt and pepper. Roast at 400 degrees for a mere five minutes or so. I personally like to check them as they’re roasting by taking my tongs and tossing them just to make sure they don’t over cook, you want them slightly limp with no signs of burning, they’re delicate. You’re not looking for mushy and overdone, you want al’dente like pasta.

butternut squash "noodles" with sausage, mushroom and kale I added crumbles of spicy Italian sausage that I pre-cooked, roasted mushrooms and kale that was sauteed in olive oil, minced garlic and red pepper flakes.

butternut squash "noodles" with sausage, mushroom and kale Gently toss everything together and add a ton of freshly grated Parmigiano Reggiano and another pass of your best olive oil.

butternut squash "noodles" with sausage, mushroom and kale This is heaven in on a plate!


Signature

Tomato Tart with Brown Rice Crust

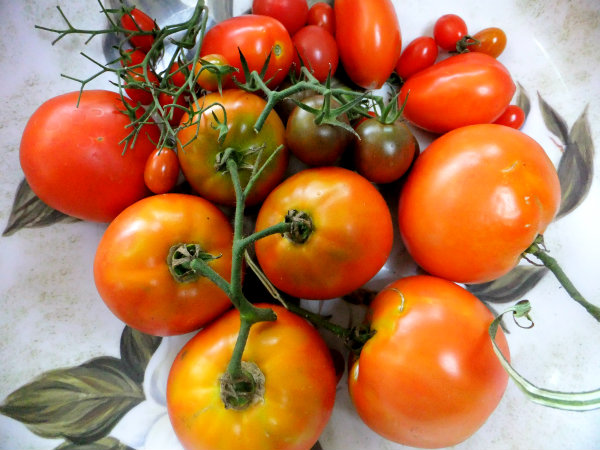
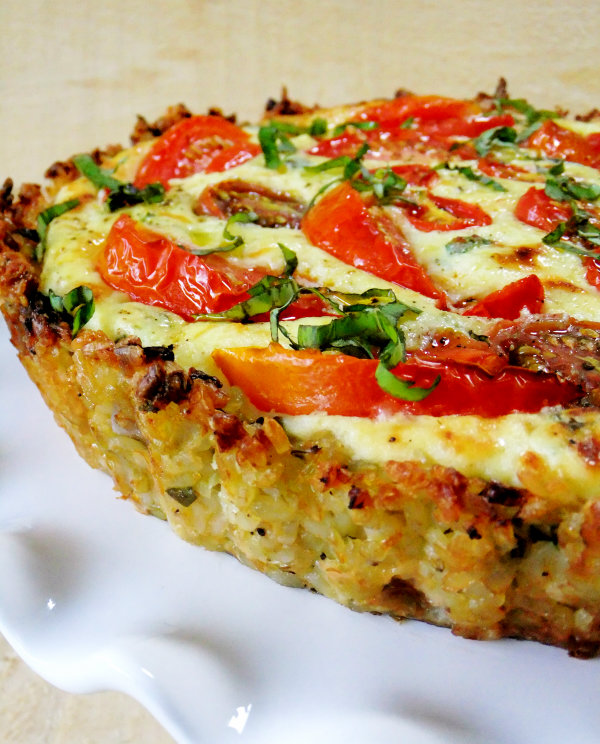
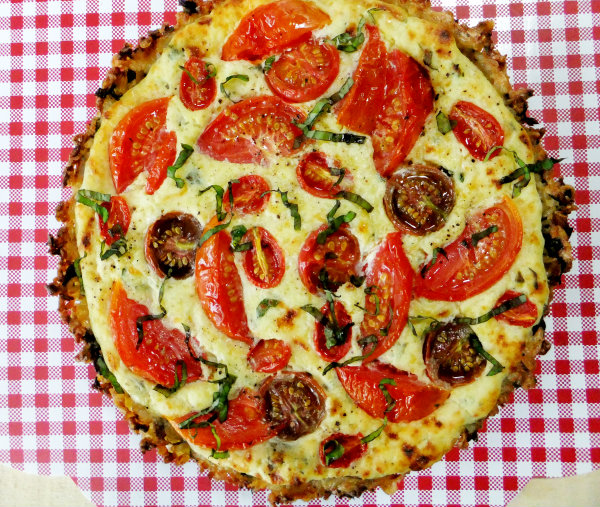
tomato tart with brown rice crust Nothing beats the taste of freshly picked, right off the vine garden tomatoes, the flavor, the texture, everything is so different, I’m sure going to miss them when there gone, but for now I’m going to enjoy them any which way I can!

Almost every meal I make, including breakfast, you’ll see a side of sliced tomatoes drizzled with good olive oil and sea salt sitting on my table, it’s a staple here in the summer.

garden tomatoes But after hauling in these beauties the other day I decided I’d make a tomato tart for dinner!

brown rice crust for tart I also remembered I had a big bag of leftover cooked brown rice sitting in my fridge, and since I hate to waste anything I thought, why not change it up a bit and make the rice be the crust for the tart instead of pastry dough.  I’m excited to say we loved it, it was so good!

tomato tart with brown rice crust I used a deeper, fluted tart pan but you could also use a deep dish pie pan, I say deep because you want plenty of room for your  rice crust, filling and topping of tomatoes.  Notice the crust edge, it came out perfectly from the pan, it had a nice crunch and chewy texture to it.

tomato tart with brown rice crust It went ridiculously good with the savory, cheesy ricotta filling!

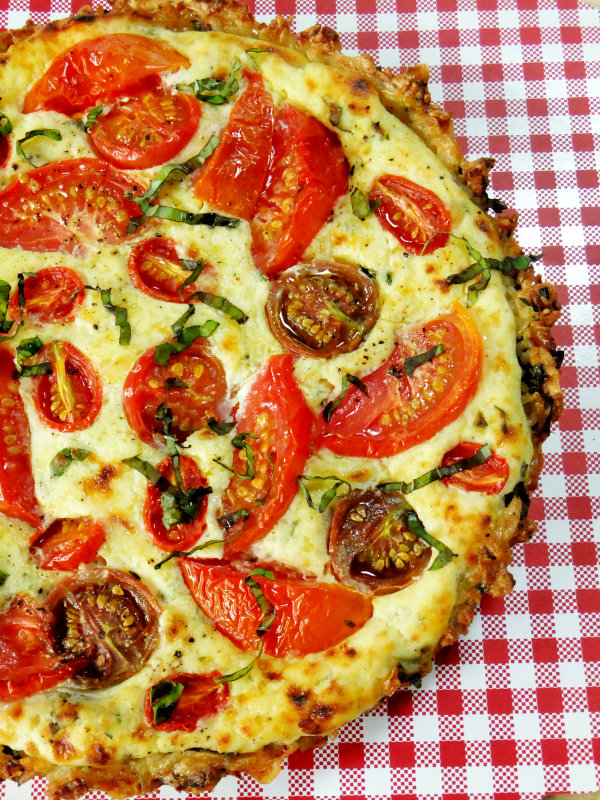
tomato tart with brown rice crust And oh, those tomatoes, what can I say? They were bursting with flavor and took the whole tart over the top!

tomato tart with brown rice crust Would you like me to cut you a wedge?

Tomato Tart with Brown Rice Crust
 
Ingredients
  • 9 inch deep fluted tart pan with removable bottom or a deep dish pie pan
  • FOR CRUST
  • 3 cups cooked brown rice
  • 2 eggs
  • 1 small onion diced and 1 garlic clove, sauteed
  • ⅓ cup of grated romano cheese
  • ¼ cup of loosely packed and shredded fontina or any other melting cheese
  • basil and parsley, fresh chopped, 2 tablespoons each
  • FILLING
  • 3 cups ricotta cheese, drained
  • 2 eggs
  • 1 clove garlic, grated on a microplane
  • ⅓ cup of grated romano cheese
  • ½ cup of shredded fontina or any other melting cheese
  • basil and parsley, fresh chopped, 2 tablespoons each
  • TOPPING
  • vine ripened tomatoes, any kind, either quartered or cut in half depending on size, enough to cover the top of tart
Instructions
  1. In a bowl, combine the rice, beaten eggs, sauteed garlic and onion, cheeses and herbs, mix well.
  2. Pat rice mixture into an olive oil sprayed tart or pie pan.
  3. Place filled tart pan on a baking sheet then into a 350 degree F. oven for 15 minutes.
  4. Remove rice crust and let it cool down.
  5. Turn up oven temp to 400 degrees.F.
  6. Mix ricotta, cheeses, herbs, eggs and garlic for the filling then spread evenly onto the cooled rice crust.
  7. Place your tomatoes all over,slightly sinking them into the ricotta mixture.
  8. Drizzle olive oil on top of the tomatoes and tart then bake for 30 minutes or until ricotta is set.
  9. To finish it, I like to place mine under the broiler to get it a nice golden color on top, but if you do that, keep checking and don't walk away from the stove!
  10. Let it cool a little before slicing.
  11. Garnish with chopped fresh basil.


Signature

Herb and Citrus Crusted Fish

herb crusted fish Here’s a simple and easy way to prepare fish and a great excuse to use up some of those fresh herbs you got growing in your garden. It’s healthy, light, packed with flavor and you can get your dinner on the table in no time!

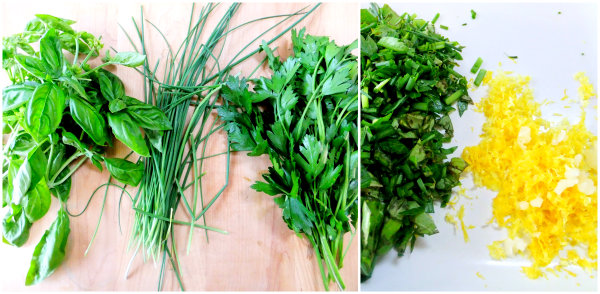
garden herbs There’s no exact recipe here, just pick some of your favorite herbs, I used basil, chives and parsley. Chop the herbs up real good, zest a whole lemon and grate one clove of garlic over a microplane, then mix everything together.

Dijon mustard coated cod Choose a beautiful fish filet, something white preferably, I used wild caught Atlantic cod.

Place your fish on a parchment lined baking sheet, season it with salt and pepper and brush some of your best Dijon mustard all over the top.

Don’t be heavy handed with the mustard, just a nice swipe all over.

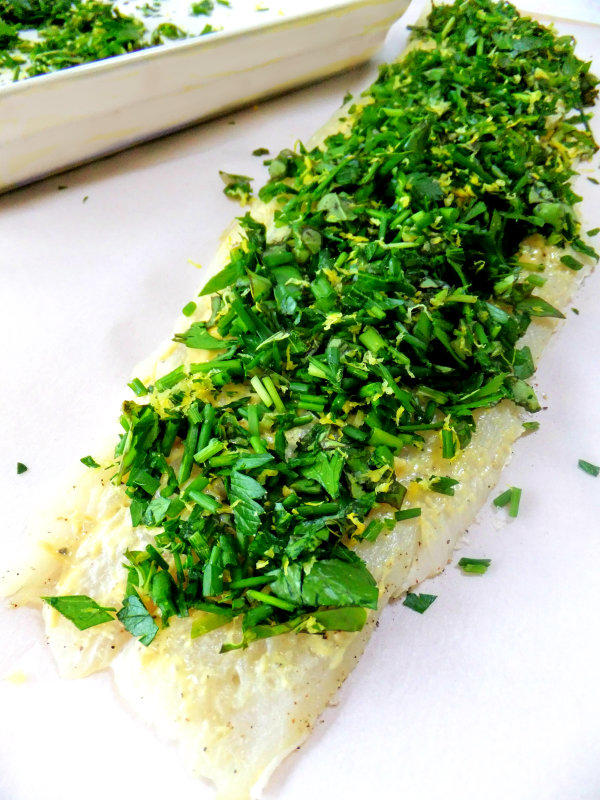
herb covered cod Now pat your herb, citrus and garlic mixture right on top, the mustard will help everything stick and add to the flavor.

Drizzle generously with olive oil before placing into the oven.

herb covered cod Roast at 400 degrees F. for 12 to 15 minutes, depending on the thickness of your fish filets.

herb covered fish Juicy, moist, with a ton of flavor and no breadcrumbs were required!

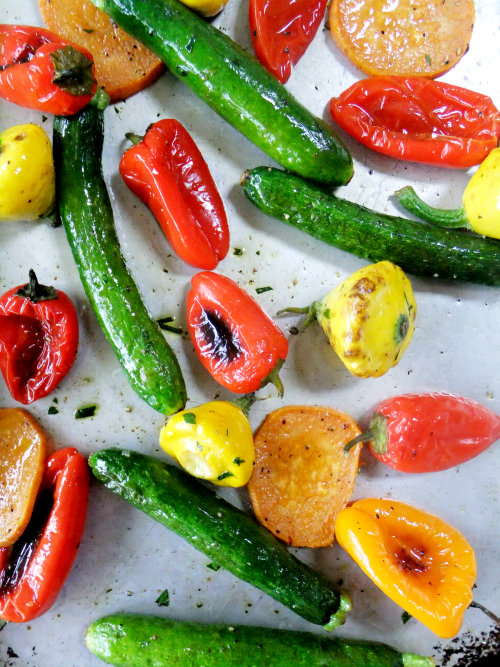
roasted veggies I roasted tiny patty pan squash along with baby zucchini, mini peppers and sweet potato slices for my side, they took as long as the fish did to cook.

herb covered cod with roasted veggies A healthy, vibrant, dinner indeed!


Signature

Summer Polenta Pizza with Grilled Corn and Roasted Tomatoes

polenta with grilled corn and roasted tomatoes Here’s a great way to showcase all those summer veggies that are popping up all over. Cook up some creamy polenta, spread it out in a pan then use it as a delicious base to set all your veggies on top. The polenta will firm up a bit and you’ll be able to cut it into wedges and serve it just like pizza!

ingredients for polenta with grilled corn As far as veggies go, the sky’s the limit as to what you’ll want to top it with, but I couldn’t resist my sweet garden tomatoes and some fresh corn that I recently picked up and decided to grill. My polenta pizza was served as a side to go along with skewered grilled shrimp, but it can certainly stand on it’s own as a main dish along with a salad.

polenta with grilled corn and roasted tomatoes Be generous with the toppings so that every wedge you cut is loaded with goodness. I love slicing my corn kernels into planks, I think it looks more appealing and deepens the flavor.

polenta with grilled corn and roasted tomatoes Speaking of flavor, what’s more intensely flavored than roasted tomatoes? Nothing in my opinion. Spoon those warm juices and sweet tomatoes all over the top, it’s a match made in heaven with the corn.

polenta with grilled corn and roasted tomatoes The polenta base is creamy yet firm, cheesy, herby, and the top is studded with all that summer offers us. It’s oh so good, indulge!

polenta with grilled corn and roasted tomatoes 

Summer Polenta Pizza with Grilled Corn and Roasted Tomatoes
 
Ingredients
  • 1 pint mixed colored cherry tomatoes, cut in half
  • 1 garlic clove grated on a microplane
  • olive oil
  • a small handful of fresh basil and parsley
  • 2 ears fresh corn, grilled and cut into planks
  • FOR THE POLENTA
  • 1 cup corn polenta, quick cooking kind
  • 3 cups water
  • 1 tablespoon of butter
  • 1 teaspoon, salt
  • 2 scallions sliced
  • ½ cup or so parmesan or romano cheese
Instructions
  1. Place foil onto a rimmed baking sheet and place cut tomatoes and grated garlic on top.
  2. Season tomatoes with salt and pepper and drizzle all over with olive oil.
  3. Place into a 375 degree F.oven and roast until tomatoes blister and juices run into the oil.
  4. Sprinkle with fresh basil when finished then set aside.
  5. For the polenta place the water into a medium sized saucepan then bring the water to a boil.
  6. Add the butter, salt and quickly whisk in the polenta.
  7. Reduce to simmer and keep whisking til nice an smooth and thickens nicely about 5 minutes.
  8. Remove from heat and stir in grated cheese, parsley, basil and scallions.
  9. Evenly spread polenta on the bottom of a serving vessel.
  10. Place your corn and tomatoes all over the top, including the juices of the roasted tomatoes.
  11. Add more herbs and cut scallions for garnish and a final drizzle of olive oil.
  12. Let the polenta firm up, it doesn't take long, then cut into wedges and serve.

Signature

Zucchini Noodles with Slow-Roasted Cherry Tomatoes and Cream

zucchini noodles with tomatoes and cream Zucchini noodles have been all the rage for quite a while now, I’ve even made them my self and posted it here on my blog. In the past I’ve used my handy julienne slicer to create my “pasta” noodles but recently I bought a Spiralizer to see what all the hype was about.

I’m really not a person who has lots of big gadgets, quite frankly I don’t like cleaning all the different parts, but I’m going to make an exception with this one, I loved it!

What I like about it is that you get long continuous noodles that really look like pasta, it’s super healthy and light, a pasta alternative when you want one, it’s low carb, gluten free and you can create a million different recipes with it just like you can with regular pasta, and just like I did with this dreamy sauce, more on that below!

So far I’ve only tried it with zucchini and yellow squash but it’s also good with potatoes, butternut squash, onions, carrots, cucumbers, the list goes on and on and it comes with three different blades.

zucchini noodles I was surprised how easy it was to use, just cut the tip and bottom off your zucchini, then slice it right in half and attach the big hunk to the slicer, now turn the handle and watch your noodles appear.  I couldn’t stop, I was out of control I used five zucchini and two yellow squash, I had a ton when I was done and it all came out perfectly, nice and curly and long.

zucchini noodleszucchini noodlesspiral vegetable slicer The feature I really love about this is that it actually cores your squash, see the picture above, all the seeds are contained which makes for a nice dry “pasta” and you know how wet zucchini can be. In fact I had so much leftover that I put it into zip bags and two days later the “pasta” was still dry, no moisture at all in the bag which is so typical of cut zucchini, that was a big plus for me!

slow roasted cherry tomatoes Now for that dreamy sauce I paired it with, it came straight out of this book, by Domenica Marchetti. I’m always roasting cherry tomatoes, I’ve done it a zillion times, but never have I placed them into heavy cream and parmesan afterwards. Brilliant!

slow roasted cherry tomatoes and cream

Wow!  I knew I would love this recipe the minute I saw it in her book, it’s decadent and oh so flavorful and actually a little goes a long way. But what’s not to love about slow roasted tomatoes, cream, parmesan, basil and thyme, it’s a match made in heaven!

zucchini noodles with tomatoes and cream And you might not feel as guilty spooning it over healthy zucchini pasta noodles, I didn’t!

Zucchini Noodles with Slow-Roasted Cherry Tomatoes and Cream
 
Ingredients
  • 3 zucchini
  • 1 yellow squash made into zucchini noodles by using either a Spiralizer or a julienne slicer.
  • For the Slow Roasted Cherry Tomatoes and Cream Sauce, adapted from Domenica Marchetti's, (The Glorious Vegetables of Italy)
  • I used a mixture of both yellow and red cherry tomatoes for added color
  • 1 pint of yellow cherry tomatoes, cut in half
  • 1 pint of red cherry tomatoes, cut in half
  • 2 tablespoons unsalted butter
  • 1 shallot, minced
  • 2 or 3 fresh thyme sprigs
  • small handful, chopped fresh basil
  • ¾ cup heavy cream
  • ¾ cup of freshly grated Parmigiano Reggiano cheese
  • olive oil
  • salt and pepper to taste
Instructions
  1. Arrange the cherry tomatoes cut side up on a rimmed baking sheet. Drizzle all over with olive oil, salt and pepper. Roast at 275 degrees F for 1½ hours until puckered but still juicy.
  2. Heat the butter in a saute pan over medium low heat, when the butter is melted and starts to foam add the shallot, cook until softened.
  3. Scrape in the tomatoes and any juices that collected on the baking sheet.Add the thyme sprigs and pour in the cream, I added half of the cheese by sprinkling it around the tomatoes and into the cream.
  4. Heat gently on low until it simmers. Turn off the heat and stir in basil.
  5. In a larger saute pan, drizzle with oilve oil and place your zucchini noodles on top, gently cooking and carefully tossing until just slightly wilted and still al dente, just a few minutes.
  6. Place zucchini noodles onto a serving platter and spoon the sauce right over the top, adding more parmesan cheese.


Signature

Chicken Nicoise Salad

chicken nicoise salad The latest kick I’ve been on is making composed salads. Just what is a composed salad you might ask? Here’s the definition, “A salad in which the components are elaborately put together or arranged, then drizzled with a vinaigrette rather than tossed”.

A composed salad is a balance of different colors, flavors and textures and when it’s arranged on a platter it’s very appealing to the eye, and the more color the better!

I repeat, it must be placed on a platter, no bowls allowed and no tossing!

chicken nicoise salad It doesn’t matter what ingredients you use, the possibilities are endless! We all know of the famous Tuna Nicoise salad, well I swapped out chicken for the tuna and used other ingredients that I had on hand.

This salad was inspired from a rotisserie chicken I got from Whole Foods and some vegetables I cooked up before they went bad, which in my case were beets, red potatoes, green beans and some peppers. I added in hard boiled eggs, sliced tomatoes, artichoke hearts and olives, placed it all on a bed of arugula and drizzled it with a fresh lemon and olive oil dressing. This is a very substantial salad, maybe a little bread on the side and that’s it!

chicken nicoise salad No exact recipe here just let your imagination go wild, use what’s in season and what you have on hand, it’s hearty, healthy and oh so delicious!


Signature

Pork and Cabbage Involtini with a Spring Vegetable Side

pork and cabbage involtini Even though it’s officially spring the weather is always fluctuating here so it often dictates what we eat. When it’s sunny and warm my first choice is to go out and grill something, but when it’s cool, rainy and dreary there’s no doubt dinner will be inside simmering on my stove.

pork and cabbage involtini That’s how this cabbage dish came about. You might think of stuffed cabbage/ involtini as only a hearty winter dish filled with meat and rice, but actually this version minus the rice and some breadcrumbs was light and super delicious, perfect for a cool spring evening!

This recipe comes courtesy of Debi Mazar and her Tuscan born husband Gabriele Corcos via their cooking show, Extra Virgin, one of the few shows I watch on The Cooking Channel. The original recipe is here, I adapted it slightly.

Little bundles of ground pork seasoned with scallions, garlic, romano cheese and parsley wrapped tightly with a tender leaf of savoy cabbage simmering in a flavorful garlic and basil marinara sauce. This is good, really good!

spring vegetables I thought a nice medley of spring green vegetables would complement the involtini and I was right, it was all that I needed to complete the meal.

I used a mixture of asparagus, artichoke hearts, and fava beans roasted together with olive oil and shaved garlic. FYI, Trader Joe’s has precooked frozen fava beans for a short time, I still had to peel the outer skins off but they were really good.

pork and cabbage involtini with spring veggies Rain or shine you’re going to love this!

Pork and Cabbage Involtini with a Spring Vegetable Side
 
Ingredients
  • INVOLTINI
  • 1 head savoy cabbage
  • 1 pound good ground pork
  • 2 eggs
  • 3 scallions, sliced small
  • 4 cloves garlic, finely chopped
  • ¾ cup grated romano cheese
  • 1 handful parsley, chopped
  • SAUCE
  • 1 quart of homemade marinara or an outstanding store bought one for convenience,
  • I make mine with crushed whole canned tomatoes, preferably San Marzano, olive oil, chopped garlic and fresh basil.
Instructions
  1. Bring a large pot of salted water to a boil.
  2. Carefully separate the best 12 leaves from your savoy cabbage
  3. Rinse, then add them in batches, to the boiling water for 2 minutes
  4. Remove leaves and quickly rinse under cold water, then pat dry
  5. Mix together the pork, scallions, eggs, garlic, romano cheese and parsley in a large bowl, then season with salt and pepper.
  6. Lay a leaf of cabbage on a cutting board, trim the thick stem at the bottom and place 2 generous tablespoons of the pork mixture in the middle.Roll up the leaf, tucking in the sides.
  7. Place seem side down on a plate until all leaves are completed.
  8. If your marinara is premade just pour some into the bottom of a heavy skillet with sides and lid.
  9. If you need to make your own, pour ¼ cup of olive oil on bottom of the pan add 4 or 5 cloves of chopped garlic, let it sizzle a little then pour in your 28 oz. can of crushed tomatoes with 1 teaspoon of salt, then add in some torn fresh basil leaves.
  10. Place the involtini on top of the sauce, nestle them in seam side down and turn heat to a low simmer, spooning some sauce on each bundle.
  11. Place a lid on top and cook until meat is cooked through and cabbage is tender.
  12. Garnish with fresh basil and grated romano cheese.
  13. .


Signature

Rainbow Carrot Ribbon Salad

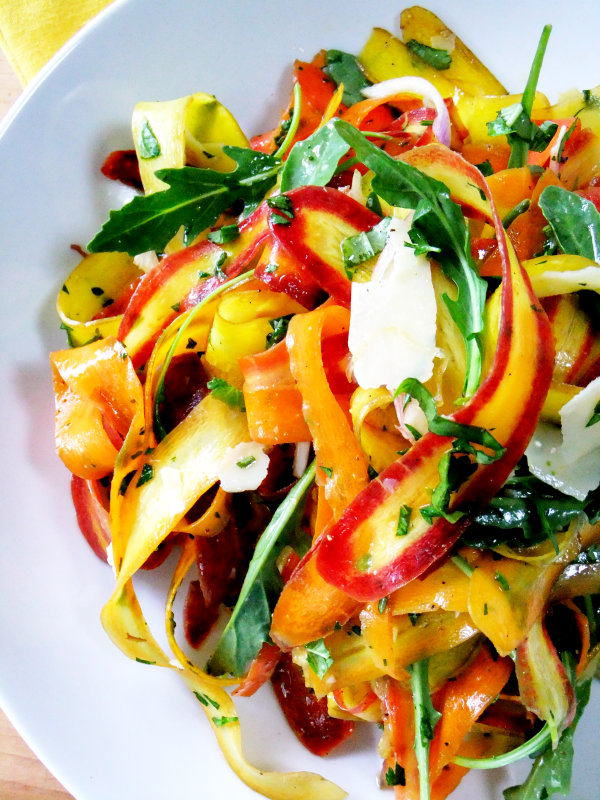
rainbow carrot saladI couldn’t resist these beautiful rainbow carrots the other day while I was shopping, I quickly stuck them into my cart not knowing what I was going to make with them, but I was inspired by their vibrant colors!
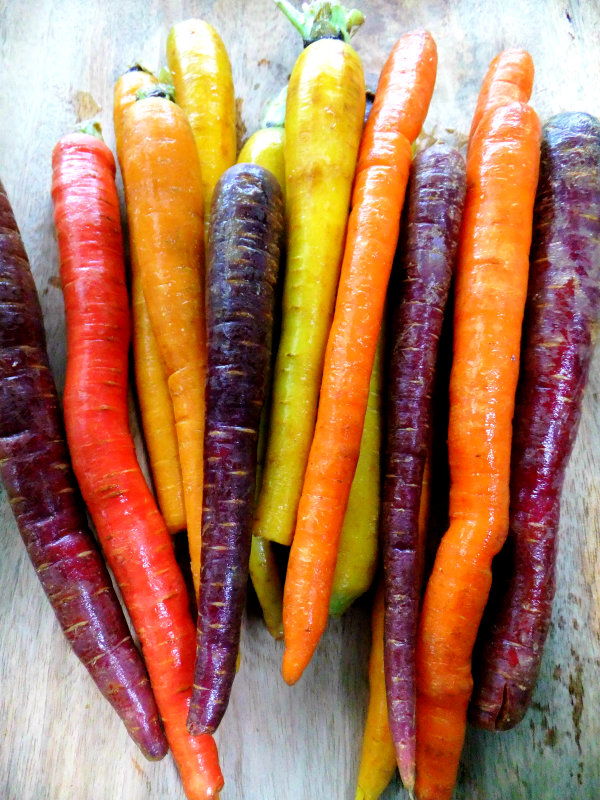
raw rainbow carrots Just look at these beauties! The colors are amazing, deep purple, yellow, red, white, peach and of course orange. I decided to make a salad, shaving the carrots into ribbons using my vegetable peeler so I could showcase all the gorgeous colors inside.

rainbow carrotsAs I was shaving them their deep rich colors were even more pronounced, my favorite was the purple with the yellow center.
shredded carrot ribbons Surprisingly their flavor isn’t all that much different, some of the carrots might taste slightly sweeter than the others but you sure can’t beat the visual! Imagine this on a large platter as a side dish. I served it with grilled salmon, a beautiful healthy meal that needed nothing else!

rainbow carrot ribbonsWorks of art for under five dollars, your guests will be impressed, it’s turns the humble carrot into a very sophisticated dish!
carrot salad Of course I had to make my salad Italian style with ribbons of Parmigiano Reggiano tossed inside, I also added arugula which balanced the sweetness of the carrots perfectly.

rainbow carrot saladFresh basil, parsley and slivers of red onion added and tossed with my homemade vinaigrette, I’m telling you there wasn’t one ribbon left on the platter!
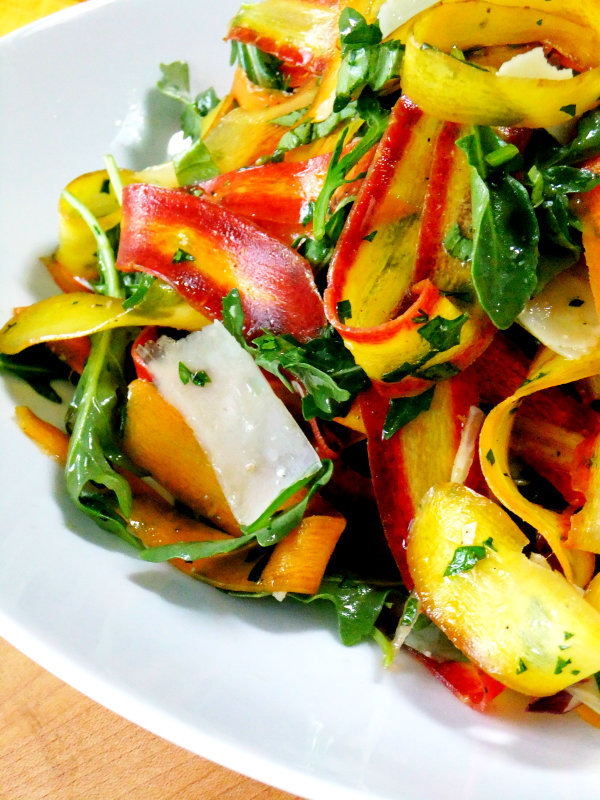
carrot salad Don’t pass these babies up!

Rainbow Carrot Ribbon Salad
 
Ingredients
  • I'm listing the ingredients, the amounts are to taste. Taste as you go!
  • rainbow carrot ribbons
  • baby arugula
  • Parmigiano Reggiano ribbons
  • slivered red onion
  • fresh parsley
  • fresh basil
  • toasted pine nuts, optional
  • salt and pepper to taste
  • light vinaigrette, recipe below
Instructions
  1. Use a large bowl to toss and coat every thing completely then place your salad on a platter.
  2. VINAIGRETTE RECIPE
  3. 3 parts good olive oil to 1 part wine vinegar, a splash of balsamic, 1 smashed garlic clove, a dollop of dijon mustard, 1 teaspoon of oregano, 1 teaspoon of kosher salt, ground pepper to taste. Whisk everything together.
Signature