Creamy Mushroom Pasta with Spring Vegetables

springtime pasta

This creamy mushroom pasta is packed with spring vegetables and those chunky meaty mushrooms make it so cozy and delicious.

As far as mushrooms go feel free to chose your favorites, you can do all of one kind or a mix of a few different ones. Here I used a chef’s sampler of wild mushrooms that I bought at Costco.
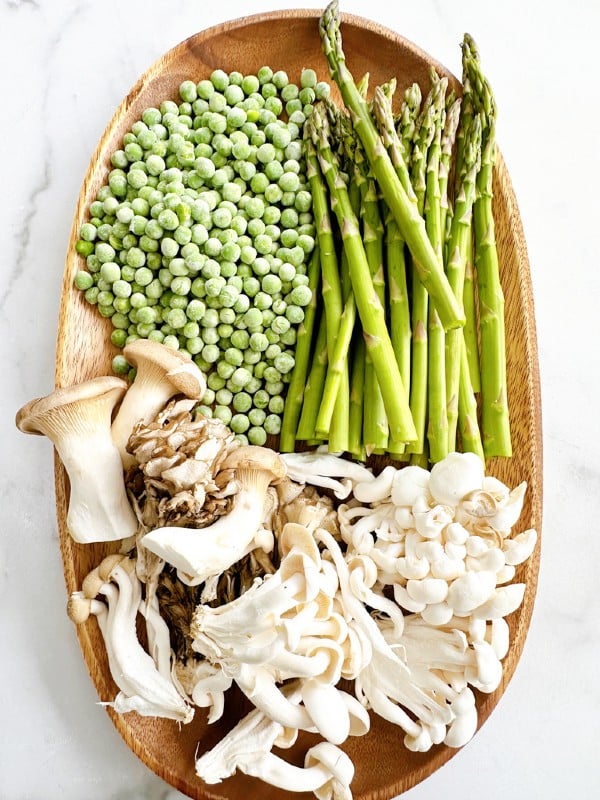
spring vegetables

Fresh asparagus is in abundance right now and it’s the perfect addition along with fresh or frozen peas.

mushroom mixture

Sautéed together with shallots, garlic, some white wine and heavy cream which creates a rich and velvety cream sauce.

creamy mushroom mix

Oh and don’t forget to add in a healthy measure of finely grated Parmigiano Reggiano to enhance the sauce even more!

spring veggies with pasta

Pick any pasta shape you like for this, it all works, although I wouldn’t do any small or tiny shape pasta.
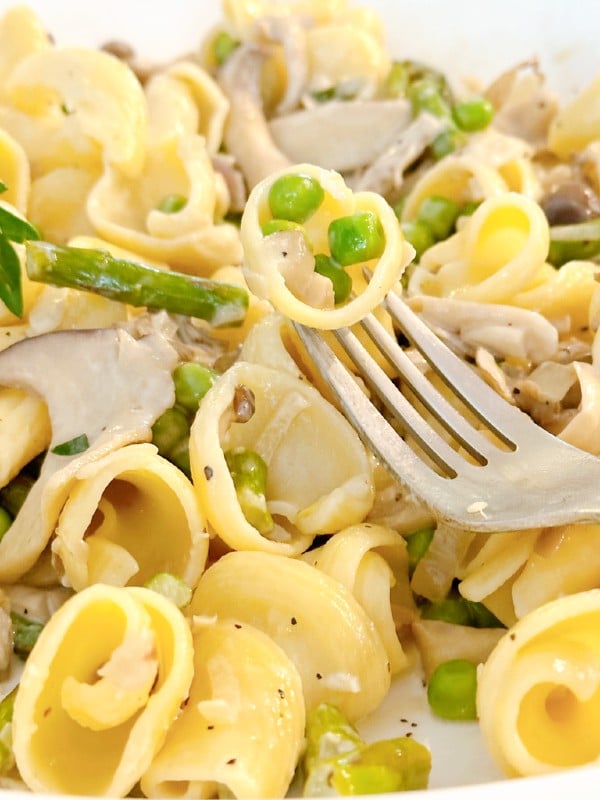
pasta with peas

This spring pasta dish would be great for a weeknight meal or even a special occasion, especially if you add in some of those “fancy ” mushrooms.

Creamy Mushroom Pasta with Spring Vegetables
 
a meaty mushroom pasta dish loaded with spring vegetables.
Author:
Ingredients
  • 12 oz. of dry pasta, a shape of your choice
  • 1 lb. of mushrooms, either a mix of a few or one kind, use your favorite, sliced
  • 1 bunch of fresh asparagus cut into 1 inch slices
  • 1 heaping cup of fresh or frozen peas
  • 2 shallots, finely diced
  • 2 large garlic cloves, finely chopped
  • splash of white wine
  • 1 cup of heavy cream
  • 1 half a stick of butter
  • 1 cup of finely grated Parmigiano Reggiano
Instructions
  1. In a large wide skillet melt the butter and add in the shallots, garlic and mushrooms, saute til wilted and mushrooms are cooked down.
  2. Note:
  3. Now if your skillet isn't big enough it's ok to saute the mushrooms and peas and asparagus one at a time, then put them altogether after they shrink down a bit and add your splash of white wine and let it cook a little bit.
  4. When vegetables are cooked down put your water on for the pasta.
  5. On a very low heat pour your heavy cream into the vegetable mix, stirring til it thickens, then shut off the heat and add in the grated cheese.
  6. Toss all that goodness into your cooked pasta and adjust with salt, pepper and more cheese if you like!
  7. Enjoy


Signature

Pan-Fried Ricotta Gnocchi with Asparagus and Peas

pan-fried ricotta gnocchi

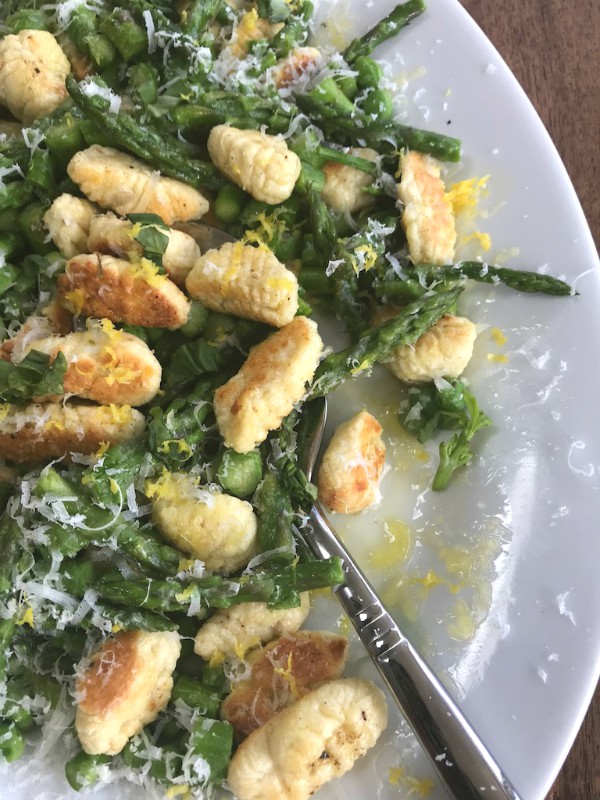
Pan-fried ricotta gnocchi is golden and crispy on the outside and soft and pillowy on the inside. Ricotta creates such a light and dreamy homemade gnocchi, which I much prefer over the potato version.

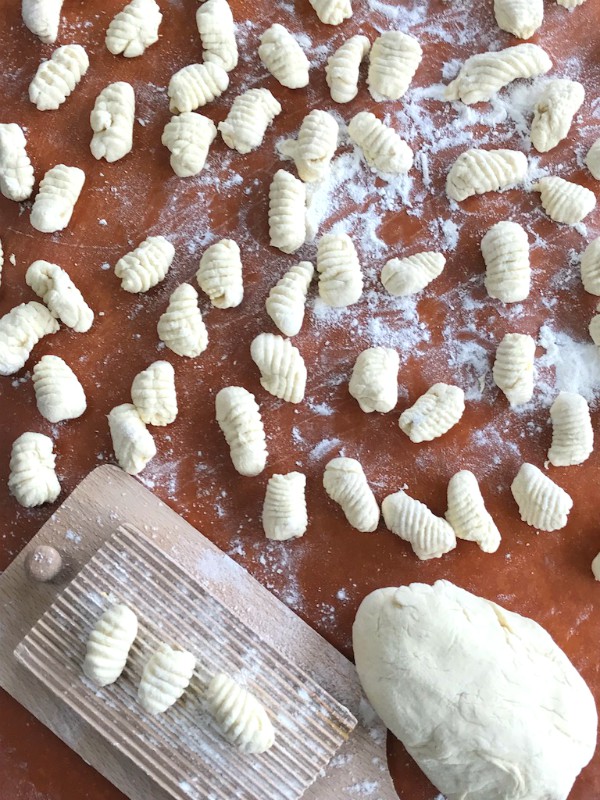
This recipe is great for spring, it’s light and doesn’t require a heavy sauce of any kind because it’s tossed together with fresh tender asparagus, peas, parmesan cheese, lemon zest and olive oil and it pairs perfectly with the soft and crispy bite of the pan-fried gnocchi. ricotta gnocchi

Some people think that making gnocchi is intimidating, but actually it’s easier than you think, and there’s absolutely no comparison to tasteless store bought, at least the ones I’ve tried.

Making them yourself is totally worth the effort and within no time you’ll get the hang of it, and they don’t have to be so picture perfect, that’s the special quality of making them homemade.


If you buy your ricotta from a good Italian deli like I do you’re usually going to have some liquid in the container when you bring it home, that needs to be drained really well to achieve a good gnocchi dough, in fact I think it is key.


I like to drain my ricotta in a strainer over a bowl that I keep in my fridge overnight, when your ricotta is nice and cold the dough comes together beautifully, if the ricotta is warm or room temperature it tends to be more sticky and you’ll keep adding more flour which in turn makes your gnocchi heavier, and we don’t want heavy gnocchi do we? We want it nice and fluffy.ricotta gnocchi


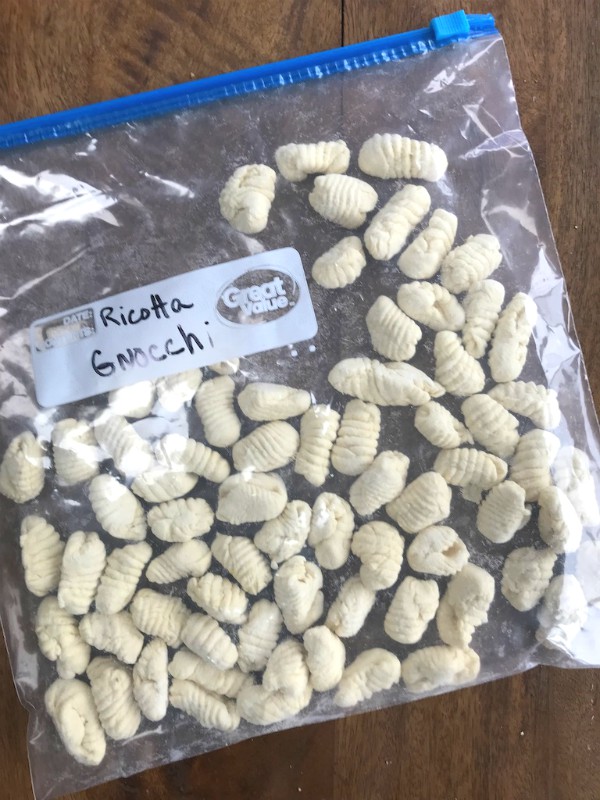
Whenever I make gnocchi I never serve them on the same day, I actually prefer to freeze them ahead of time and for some reason I think they cook up better from the frozen state, but one very important thing that I do before I freeze them is to boil up a couple just to make sure they don’t come apart, if they do, I’ll add a little more flour to the dough, just a little at a time. Then retest a couple more until they’re perfect, intact little dumplings holding together nicely in a gentle boil.

Gnocchi take only a few minutes to cook, toss them into a rolling gentle boil with salted water, give them one good stir, let them rise to the top and boil for an additional 1-2 minutes, scoop them out with a wide hand strainer. Never pour them directly into a strainer for fear they might break, you must be gentle and handle with care.

For the pan-fried version you scoop them out of the water and immediately toss them into a skillet with a mix of butter and olive oil letting them get slightly crispy golden on each side.

If you’re going through the trouble of making homemade gnocchi you might as well make a double batch like I do, you’ll be glad you did and besides it’s nice to have a stash set aside in your freezer, some for pan-frying and some for boiling and tossing into your favorite sauce.pan-fried ricotta gnocchi

I’m in love with this dish, it’s perfect for springtime, easy enough to make mid week and elegant enough to serve at a dinner party.pan-fried ricotta gnocchi

Pan-fried ricotta gnocchi gives you a little different take on the traditional boiled gnocchi, and the texture of the gnocchi holds up really well to the spring veggies you’re highlighting, but either way you choose to prepare it you can’t go wrong.

Follow me on Instagram where you can see what else I’m cooking up during the week.

5.0 from 2 reviews
Pan-Fried Ricotta Gnocchi with Asparagus and Peas
 
Author:
Ingredients
  • FOR THE RICOTTA GNOCCHI
  • 1½ cup of drained ricotta, nice and cold
  • ½ cup of grated Parmigiano Reggiano or Pecorino Romano
  • 1 beaten egg
  • 1 teaspoon of salt and a few grinds of black pepper
  • 1 cup or so of unbleached all purpose flour
  • VEGETABLE TOSS
  • 1 bunch of tender asparagus, chopped small like pea size but leaving the pretty tips on
  • 1 cup of frozen, defrosted peas
  • zest of 1 lemon
  • 2 finely chopped garlic cloves
  • olive oil for drizzle
  • a knob of butter
  • more Parmigiano for garnish
Instructions
  1. PREPPING THE VEGGIES
  2. In a separate skillet, drizzled with olive oil, toss in your chopped asparagus, garlic and defrosted peas, sauteing until nicely al-dente, then set aside.
  3. FOR THE GNOCCHI
  4. Place ricotta, grated cheese, salt and pepper into a bowl, whisk egg then add in.
  5. If ricotta is lumpy, which it usually is, take a hand mixer on low to break up the lumps and just to incorporate all the ingredients.
  6. Then fold in flour, little by little, you might need less or you might need more, but dough should come together quickly and it will feel slightly sticky.
  7. Lightly flour your finger tips and a board.
  8. Cut off a chunk then roll it into a round snake, then cut off bite size pieces.
  9. Leave as is or make indention's with a gnocchi board or the tines of a fork.
  10. At this point you can freeze them single layer, then once frozen place them into zip lock bags, they stay good for a month.
  11. WHEN READY TO COOK THE FROZEN GNOCCHI
  12. Toss them into salted boiling water, let them float to the top and cook maybe another minute or so, then scoop them out carefully with a hand strainer, like a spider.
  13. For pan-fried, drain them first then crisp them up in an additional skillet with a good drizzle of olive oil and a small knob of butter, turning them until they crisp up golden on each side.
  14. Then incorporate the precooked veggies you had set aside together with the golden crisp gnocchi.
  15. Place them onto a platter adding more grated cheese of course, more olive oil and scatter the lemon zest all around.
  16. Happy Spring!


Signature

Shrimp Risotto with Asparagus, Peas and Pepper Rings

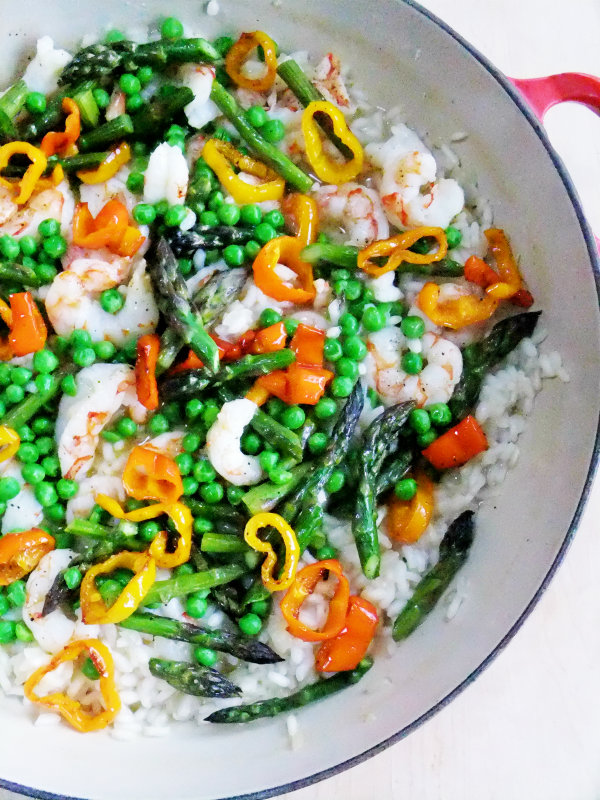
shrimp risotto with asparagus, peas and peppers

Risotto really isn’t a difficult dish to make it just takes commitment, there’s stirring involved and you have to pay close attention, it’s a labor of love but the end result is so worth it and it ends up all in one pan!

You can make a simplified version any day of the week or you can jazz it up for a special occasion with impressive results.

Be creative, there are hundreds of variations to try, but make it your own using the flavor combinations that you like, you can never go wrong, the rice is your blank canvas.

ingredients for shrimp and vegetable risotto

Some of the basic rules for making a perfect risotto, besides stirring is to use a short grain rice like arborio or carnaroli, it’s going to give you that creamy texture and bite you’re looking for. Another essential is a good, heavy bottomed pan, never use nonstick!

Next, your going to need some hot broth simmering on the stove, then a little butter, olive oil, onion, cheese and wine, things you usually have stocked in your home and whatever veggies, herbs and proteins you want to add in.shrimp risotto with asparagus, peas and peppers

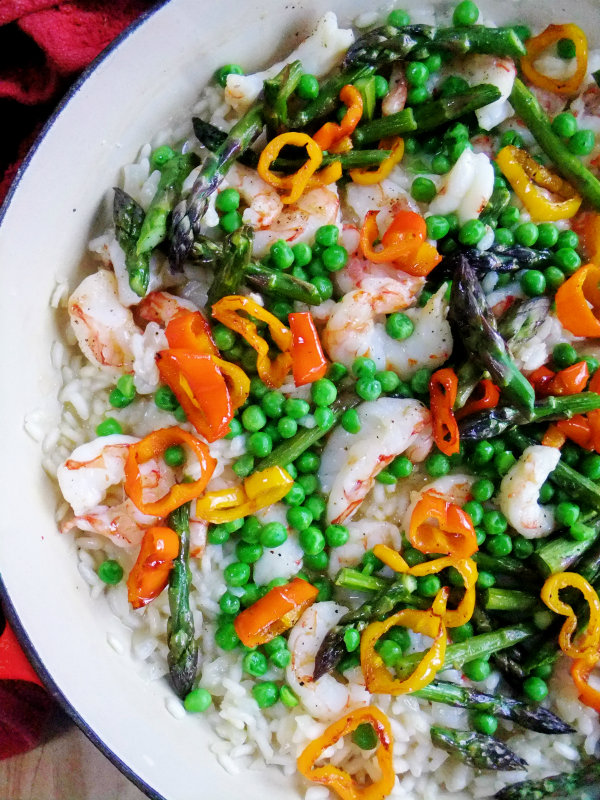
I used shrimp, asparagus, peas and mini peppers that I cut into rings. All veggies and shrimp were pre-cooked ahead of time and tossed in after the basic risotto base was made.

shrimp risotto with asparagus, peas and peppers

I could be happy with just the the veggies and creamy rice all by itself but the roasted shrimp takes it over the top!

They say your not suppose to mix cheese with seafood, well too bad, I broke the rules, because a little Parmigiano Reggiano never hurt anyone and besides it truly heightens the flavor of the whole dish, so go on and be a rebel!

Shrimp Risotto with Asparagus, Peas and Pepper Rings
 
A one pan meal that is simple, elegant, creamy and sophisticated
Author:
Ingredients
  • 1 quart boxed chicken broth, or homemade or vegetable if you wish
  • 1 cup of arborio rice, or other short grained rice
  • 1 lb. medium shrimp, peeled and deveined, fresh or frozen but patted dry
  • 1 lb. asparagus, fresh cut on the diagonal
  • 1 heaping cup of peas, frozen and defrosted
  • 1 small bag of mini peppers, red yellow and orange cut into rings
  • ½ onion, finely diced
  • ½ cup dry white wine
  • ½ to ¾ cup of freshly grated Parmigiano Reggiano
  • 2 tablespoons butter
  • olive oil
Instructions
  1. Foil line a rimmed sheet pan, drizzle with olive oil and roast shrimp at 4oo degrees until plump and pink, remove and set aside.
  2. Roast asparagus as well in seperate pan, drizzled with olive oil at 400 degrees, set aside.
  3. Defrost peas, set aside.
  4. In a small saute pan, stove top cook pepper rings until soft and slightly golden colored, set aside.
  5. In a heavy bottomed pan add 1 table spoon of butter and 1 tablespoon of olive oil then toss in the onion and cook until soft.
  6. Pour stock into a separate pot and start to heat up, when completely heated keep it on a simmer.
  7. On medium heat, toss in the rice and toast it up a bit, stirring and coating it in the butter and olive oil.
  8. Deglaze with the wine, stirring with a wooden spoon until completely dissolved.
  9. Start adding 1 cup at a time of the hot stock with pan still on medium heat stirring until liquid is absorbed, when pan starts to look dry add more broth 1 cup at a time.
  10. Stir, stir, stir while adding the hot broth, you might have a cup of broth leftover, or you might use it all depending on creamy result of rice.
  11. The end result should be a little soupy, creamy and the rice should have a little bite to it, al dente but not rock hard or mushy, you have to be the judge.
  12. Remove from heat, stir in remaining butter, and grated Parmigiano Reggiano.
  13. Toss in the roasted cooked shrimp and all juices on the pan and lastly add in the cooked vegetables.


Signature

Seared Scallops with Pea Puree

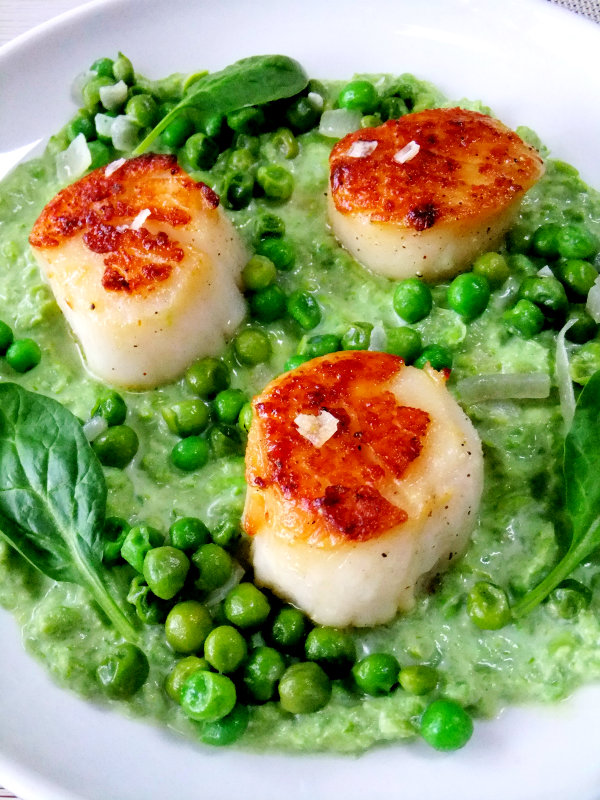
seared scallops with pea puree

Here’s an impressive dish that takes maybe twenty minutes or so, and it tastes divine!

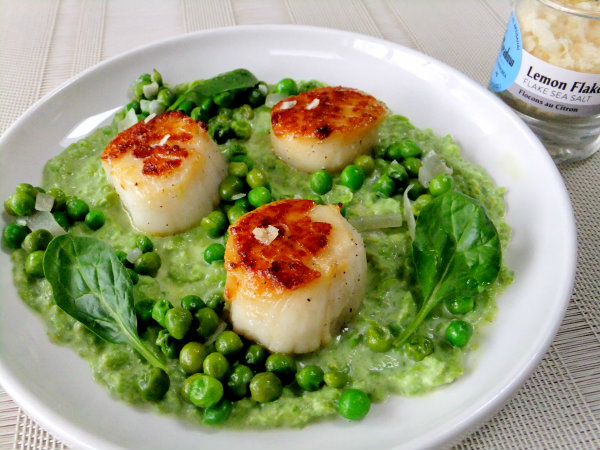
seared scallops with pea puree

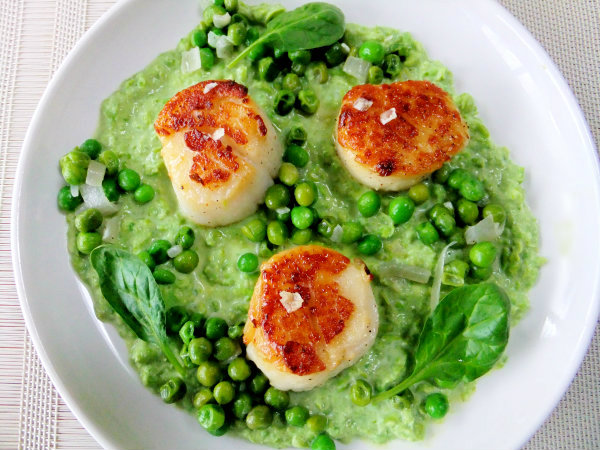
Buttery rich perfectly seared scallops get placed on top of a pea puree flavored with garlic, shallots, a little cream and lemon zest, it’s ethereal!


seared scallops with pea puree

Each bite gets swiped into the dreamy sauce for the perfect explosion of flavors!seared scallops in pea puree

I have to thank my friend Stacey and Saveur for the inspiration for this dish, I will be making it again and again!

5.0 from 1 reviews
Seared Scallops with Pea Puree
 
An impressive dish, easy to prepare and tastes divine!
Author:
Ingredients
  • Dinner for two!
  • 8 large, dry natural scallops
  • 1 bag of frozen peas, 1 lb.
  • 1 cup of water or broth
  • ⅔ cup of half and half, or more if needed to loosen puree
  • 2 shallots, minced
  • 1 large garlic clove, crushed
  • 2 tablespoons, unsalted butter
  • olive oil for searing scallops
  • zest of 1 lemon
Instructions
  1. Add butter in a skillet over medium heat, add garlic and shallots and cook until soft.
  2. Add peas and 1 cup of water or broth and cook until sauce is reduced.
  3. Set aside 1½ cups of the cooked peas, keep warm
  4. Place the remaining pea mixture into a food processor, add the half and half, a pinch of the lemon zest and salt and pepper to taste.
  5. Pulse until you get a nice creamy consistency that you desire, I did not make mine completely smooth.You can add more cream if so desired.
  6. Place in a small sauce pan and keep warm.
  7. For the scallops, get your skillet nice and hot, do not use a nonstick pan.
  8. Salt and pepper your scallops and make sure they are dry.
  9. When pan is nice and hot drizzle olive oil on the bottom.
  10. Place scallops in pan and don't move them until you see a dark golden crust form.
  11. Flip them over when crust is formed, cook for 1 more minute, then remove.
  12. To plate spread pea puree on a plate, add scallops and sprinkle some of those reserved whole peas all around.
  13. Garnish with a little lemon zest on top or if your lucky to find some lemon flaked salt like I did, you can use that instead.


Signature

Smashed Peas with Ricotta Toasts

I came across this fantastic recipe the other day while I was sitting in the waiting room of my husbands Chiropractor. I picked up the February issue of Better Homes and Garden and while flipping through it, I found this and I instantly knew I was going to make it.

For a split second I thought about silently ripping the page out, but then that wouldn’t be very nice, so I started fishing through my purse but couldn’t find a pen, so I finally just asked the office girl if she would kindly make a copy for me and she did, I was happy!

It’s hard to explain how good this is, but think fresh lemon juice, sauteed garlic, fresh mint and cracked pepper swirled into a puree of peas and edamame flavored with salt and a healthy drizzle of olive oil, but then the best thing is, you take it and smear it on top of a baguette slice that was slathered with ricotta and toasted under the broiler! Oh my, it’s addicting!
This is such a great appetizer, it makes a ton and it’s really healthy, no mayonnaise, sour cream or cream cheese to make you feel guilty about eating it.

The thinly shaved garlic is a must as well as the coarsely cracked pepper, that along with the lemon and mint make a wonderful flavor combination.

Here’s the recipe:
Adapted from BHG February 2010 issue
1 16oz. pkg, frozen peas
1 12oz. pkg frozen or precooked and shelled edamame
1 T olive oil
4 cloves thinly sliced garlic
2 T lemon juice
1 to 2 tsp. freshly cracked pepper
kosher salt to taste
1/4 cup snipped fresh mint
1/2 lb.of sliced baguette
1 cup ricotta cheese
Extra olive oil for drizzling
1. In a large pot cook peas and edamame for 5 minutes in a small amount of boiling water. Drain, transfer to food processor and puree.
2. In a small skillet with olive oil, add garlic and cook till tender. Stir into pureed peas along with the lemon, pepper, salt and mint.
3. Meanwhile, for ricotta toasts, spread baguette slices with ricotta cheese, arrange on a baking sheet and broil until ricotta is warm and bread is toasted. Sprinkle with salt and cracked pepper.
4. Before serving drizzle pea mixture with olive oil and additional cracked black pepper.

Buon Appetito!
Signature